e30 manual transmission swap
- Published
- in Manuals
The E30 manual transmission swap is a popular modification among BMW enthusiasts, enhancing performance and driver engagement. It involves replacing the automatic gearbox with a manual unit, offering better control and precision. While challenging, the swap is rewarding for those seeking an immersive driving experience.
1.1 Overview of the E30 Manual Transmission Swap
The E30 manual transmission swap is a complex but rewarding process, converting an automatic BMW E30 to a manual setup. It involves replacing the automatic gearbox with a manual transmission, such as the popular Getrag 260, and adapting necessary components. This swap enhances drivetrain responsiveness and driver engagement, appealing to enthusiasts seeking a more immersive driving experience.
1.2 Benefits of Converting from Automatic to Manual
Converting an E30 to manual offers improved control, increased fuel efficiency, and enhanced driving performance. Manual transmissions typically weigh less and provide better acceleration; Drivers also experience a more engaging connection to the vehicle, making it ideal for enthusiasts seeking a sportier feel and improved handling. Additionally, manual swaps can boost resale value among BMW purists.

Choosing the Right Manual Transmission
Selecting the right manual transmission for your E30 involves considering compatibility, performance needs, and durability. The Getrag 260 is a popular choice for its reliability and smooth shifting.
2.1 Popular Transmission Options for E30
The Getrag 260 is the most popular choice for the E30 swap, known for its durability and smooth shifting. Other options include the Getrag 240 and ZF 5-speed, offering similar compatibility. These transmissions are widely available and trusted for their performance and reliability in the E30 chassis.
2.2 Getrag 260 Transmission: Features and Compatibility
The Getrag 260 is a 5-speed manual transmission designed for BMWs, offering smooth gear engagement and durability. It’s compatible with most E30 models, including the 325i and 318i, and pairs well with the M20 and M40 engines. Its compact design and robust construction make it the ideal choice for enthusiasts seeking a reliable and performance-oriented manual swap.
Preparation for the Swap
Preparation is crucial for a successful E30 manual transmission swap. Gather tools, parts, and ensure the vehicle is ready for disassembly and component replacement.
3.1 Tools and Equipment Needed
A successful E30 manual transmission swap requires specific tools. Essential items include a socket set, wrenches, jack stands, transmission jack, and clutch alignment tool. Additional specialized tools may be necessary for disassembly and reassembly.
3.2 Essential Parts and Components
The E30 manual transmission swap requires several key components, including a compatible manual transmission, clutch kit, driveshaft, and linkage. Additional parts like a clutch pedal assembly, master and slave cylinders, and hydraulic lines are necessary. Electrical components such as a reverse light switch and wiring harness may also be needed for proper functionality.
3.3 Preparing the Vehicle for Transmission Removal
Before removing the transmission, disconnect the battery and drain the fluid to prevent spills. Raise the vehicle on jack stands for access. Remove surrounding components like the exhaust and heat shields. Label wiring and connectors for easy reconnection later. Ensure all necessary tools and equipment are within reach to streamline the process.
Removing the Automatic Transmission
Removing the automatic transmission requires careful preparation, specialized tools, and mechanical expertise. Ensure the vehicle is securely supported and components are properly disconnected. This step is critical for a smooth swap.
4.1 Step-by-Step Process for Transmission Removal
Start by disconnecting the battery and draining the transmission fluid. Remove the driveshaft and support the transmission with a jack. Disconnect electrical connectors, hydraulic lines, and mount bolts. Carefully lower the transmission and slide it out. This process requires precision to avoid damage to surrounding components. Ensure all parts are labeled for reinstallation later.
4.2 Disconnecting Electrical and Hydraulic Components
Begin by disconnecting the electrical connectors from the transmission, such as the reverse light switch and speed sensor. Use a wrench to release hydraulic lines, ensuring minimal fluid leakage. Cap lines immediately to prevent contamination. Carefully label all connectors and lines for easy reconnection later; Avoid damaging wiring or hoses during removal to ensure a smooth reinstallation process.
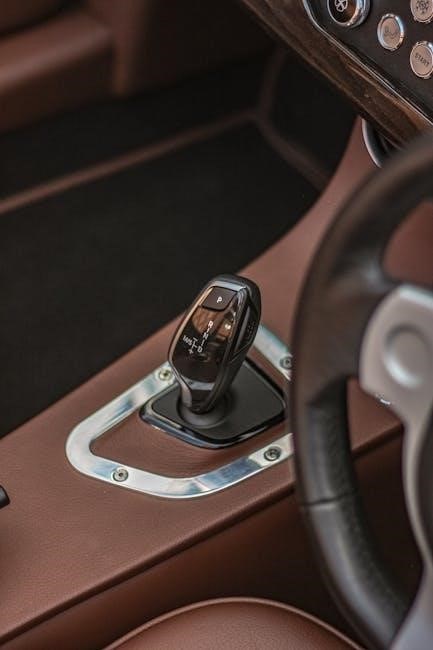
Installing the Manual Transmission
Installing the manual transmission involves carefully aligning and securing the Getrag 260, ensuring proper fitment and connection points for a seamless swap experience.
5.1 Mounting the Manual Transmission
Mounting the manual transmission requires precise alignment with the engine and chassis. Ensure the Getrag 260 is securely fastened using the correct bolts and spacers. Properly position the transmission jack to stabilize the unit during installation. Verify that all mounting points are correctly aligned to avoid damage or misalignment. This step is critical for a smooth and successful swap.
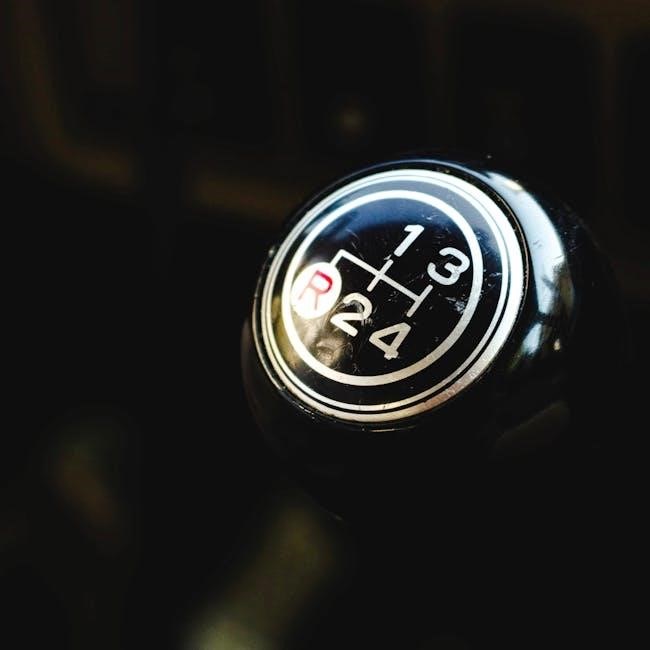
5.2 Connecting the Driveshaft and Linkage
Connecting the driveshaft and linkage requires careful alignment with the manual transmission. Ensure the driveshaft is securely fastened to the transmission using the correct hardware. Properly attach the linkage to the shifter mechanism, adjusting for smooth gear engagement. Verify all connections are tight and free from play to ensure reliable operation and prevent vibrations or misalignment issues during driving.
Clutch Installation and Setup
Clutch installation involves removing the old clutch and aligning the new unit with the flywheel. Ensure proper alignment pins are used for accurate placement and secure the clutch kit. Tighten the pressure plate evenly to avoid warping. Connect the clutch slave cylinder and bleed the system to remove air bubbles for smooth engagement.
6.1 Choosing the Right Clutch Kit
Choosing the right clutch kit is crucial for optimal performance; Consider your driving style and conditions. OEM kits offer reliability, while performance or ceramic clutches provide enhanced grip for spirited driving. Always match the clutch kit to your transmission and engine specifications for seamless integration and maximum efficiency.
6.2 Installing the Clutch and Pressure Plate
Installing the clutch requires precision to ensure proper alignment and functionality. Attach the pressure plate to the flywheel, then carefully place the clutch disc. Use alignment tools to center the disc accurately. Tighten the pressure plate bolts evenly in a star pattern to avoid warping. Ensure all components are clean and free from grease for optimal engagement.
Wiring and Electronics Considerations
Adapting wiring for manual transmission involves reconfiguring the reverse light circuit and clutch switch connections. Ensure proper electrical compatibility to maintain functionality and avoid system errors.
7.1 Understanding the Reverse Light Switch Wiring
The reverse light switch wiring is crucial for proper functionality. It activates the reverse lights when the transmission is in reverse gear. For a manual swap, the switch must be correctly connected to the new transmission’s reverse gear position. Improper wiring can lead to malfunctioning lights, potentially causing safety issues or legal problems during inspections.
7.2 Adapting Electrical Connections for Manual Transmission
Adapting electrical connections for a manual transmission involves identifying and reconfiguring key connectors. The transmission control module may need adjustments to recognize the new manual setup. Proper wiring ensures smooth operation of essential systems like reverse lights and speed sensors. Precise connections are critical to avoid electrical malfunctions and ensure reliability. Consult a wiring diagram or specialist for accuracy.
Pedal Assembly Installation
Installing the pedal assembly involves mounting the clutch pedal and ensuring proper alignment with the manual transmission components. Secure the assembly and connect the linkage for smooth operation.
8.1 Installing the Clutch Pedal Assembly
The clutch pedal assembly installation begins by attaching the pedal to the firewall using the provided hardware. Ensure all bolts are securely tightened to prevent movement. Next, connect the pedal rod to the master cylinder, aligning it properly with the clutch linkage. Proper alignment is crucial for smooth engagement and consistent pedal feel.
8.2 Adjusting the Clutch Pedal and Linkage
Adjusting the clutch pedal and linkage ensures proper engagement and disengagement. Start by locating the adjustment points on the pedal and linkage. Tighten or loosen the connecting rod to achieve the desired pedal height and free play. Once set, test the clutch engagement by depressing the pedal fully and checking for smooth operation. Fine-tune as needed for optimal performance.

Bleeding the Clutch System
Bleeding the clutch system is essential to remove air bubbles, ensuring proper hydraulic pressure. Use a pressure bleeder for efficiency and follow manufacturer instructions for optimal results.
9.1 Importance of Proper Clutch Bleeding
Proper clutch bleeding ensures optimal hydraulic system performance by eliminating air bubbles. This guarantees smooth engagement and consistent pedal feel, preventing issues like spongy pedals or incomplete disengagement. Air in the system can lead to unreliable clutch operation, making it crucial for both safety and driving performance to bleed the system thoroughly after installation or maintenance.
9.2 Step-by-Step Bleeding Process
Bleeding the clutch system involves using a pressure bleeder or manual pumping of the pedal to eliminate air bubbles. Start by filling the reservoir with DOT 4 brake fluid. Pump the pedal 10-15 times, then hold it down while an assistant opens the slave cylinder bleeder valve. Repeat until fluid flows without air bubbles, ensuring smooth clutch engagement and consistent pedal feel.
Cooling and Ventilation Considerations
Proper cooling is crucial for manual transmissions. Upgrading to an external transmission cooler enhances especially heat dissipation, ensuring optimal performance and longevity of the gearbox.
10.1 Ensuring Proper Transmission Cooling
Proper transmission cooling is vital for longevity and performance. Inspect and clean the existing cooler, and consider upgrading to an external transmission cooler for enhanced heat dissipation. Ensure all coolant lines are secure and free from leaks to maintain consistent fluid flow and optimal operating temperatures during driving.
10.2 Upgrading Cooling Systems for Manual Transmission
Upgrading the cooling system enhances reliability under increased load. Install a high-performance external transmission cooler with durable lines to improve heat dissipation. Additionally, ensure proper airflow around the radiator and consider a transmission temperature gauge for monitoring. These upgrades prevent overheating and extend the lifespan of your manual transmission during spirited driving conditions.

Cost Analysis of the Manual Transmission Swap
The E30 manual transmission swap involves significant costs, including labor, parts, and tools. Professional installation can range from $1,500 to $3,000, depending on complexity and location.
11.1 Labor Costs for Professional Installation
Labor costs for a professional E30 manual transmission swap typically range between $1,500 and $3,000. This includes transmission removal, clutch replacement, and linkage adjustments. Rates vary based on location, mechanic expertise, and workshop fees, with hourly rates averaging $100 to $200. A skilled technician ensures a smooth, efficient installation, making the investment worthwhile for optimal performance and reliability.
11.2 DIY vs. Professional Installation: Cost Comparison
A DIY E30 manual swap can save significant costs, with parts averaging $1,500 to $2,500, depending on transmission and clutch quality. Professional installation typically adds $1,500 to $3,000 in labor, totaling $3,000 to $5,500. DIY requires tools, expertise, and time but offers substantial savings, while professional work ensures reliability and efficiency, making it a worthwhile investment for many enthusiasts.
Common Issues and Troubleshooting
Common issues include reverse light switch wiring problems, clutch alignment, and hydraulic system leaks. Troubleshooting involves checking connections, bleeding the system, and ensuring proper installation of components.
12.1 Troubleshooting Common Swap-Related Problems
Common issues during the E30 manual swap include reverse light switch wiring problems, clutch system leaks, and transmission cooling inefficiencies. Troubleshooting involves inspecting electrical connections, bleeding the hydraulic system, and ensuring proper transmission mounting. Addressing these problems early prevents further mechanical damage and ensures smooth operation of the manual transmission setup.
12.2 Addressing Electrical and Mechanical Issues
Electrical issues often arise from faulty reverse light switch wiring or improper connector installation. Mechanical problems may include misaligned transmission mounts or insufficient clutch system bleeding. Ensure all electrical connections are secure and properly routed. Inspect mechanical components for wear or misalignment, and bleed the clutch system thoroughly to eliminate air bubbles, ensuring smooth operation and preventing further complications.
The E30 manual transmission swap is a rewarding project that enhances performance and driver engagement. While challenging, the outcome offers improved control and a satisfying driving experience.
13.1 Summary of the E30 Manual Transmission Swap
The E30 manual transmission swap is a transformative project that enhances driving engagement and performance. It involves replacing the automatic gearbox with a manual unit, such as the Getrag 260, and requires careful planning, specialized tools, and mechanical expertise. The process includes transmission removal, clutch installation, and wiring adjustments, offering a more connected and satisfying driving experience for enthusiasts.
13.2 Final Tips for a Successful Swap
Plan meticulously, ensuring all parts and tools are ready. Consult BMW communities for insights and troubleshooting. Test the setup thoroughly post-installation to identify and address any issues early. Prioritize precision and patience, as shortcuts can lead to costly repairs. Consider seeking professional help if unsure, especially for complex steps like wiring or clutch alignment. Proper preparation ensures a smooth, enjoyable driving experience.