manual pump for well

Manual well pumps are essential devices for extracting water from wells without electricity, ensuring reliable access during power outages. Durable, easy to operate, and cost-effective, they provide a sustainable solution for off-grid water needs.

1.1 What is a Manual Well Pump?

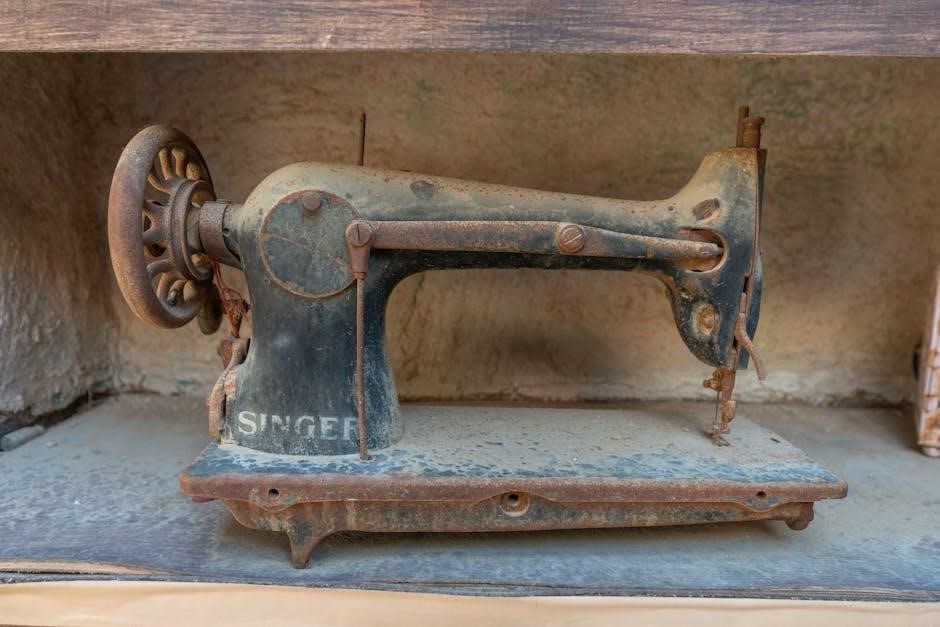
A manual well pump is a device used to extract water from a well without electricity, relying on human effort. It operates via a handle or lever, creating suction to draw water upward. Suitable for both deep and shallow wells, these pumps are durable, eco-friendly, and ideal for off-grid scenarios. Constructed from materials like stainless steel or PVC, they ensure long-term reliability. Manual pumps are a practical solution for emergency water access, offering simplicity and independence from power grids.

1.2 Importance of Manual Pumps for Water Access

Manual well pumps are crucial for consistent water access, especially during power outages. They offer a reliable, cost-effective solution with minimal environmental impact. Models like the Simple Pump and Bison Pumps ensure durability and ease of use. These pumps are ideal for emergencies, providing long-term water security without electricity. Their importance lies in their ability to function independently, making them essential for off-grid and remote locations.

Types of Manual Well Pumps

Manual well pumps come in various types, including deep well, shallow well, and emergency backup models, each designed for specific water access needs and well depths.

2.1 Deep Well Hand Pumps

Deep well hand pumps are designed for wells with static water levels exceeding 20 feet. These pumps use pistons and cylinders to lift water from significant depths. Simple Pump and Bison Pumps are popular models, offering durability and reliability. They often feature stainless steel construction for corrosion resistance and longevity. Some models allow conversion to motorized operation, providing flexibility for users. These pumps are ideal for off-grid scenarios, ensuring water access even during power outages or emergencies. Regular maintenance ensures optimal performance and longevity.

2.2 Shallow Well Hand Pumps

Shallow well hand pumps are ideal for wells with water levels up to 20 feet. These pumps are lightweight, portable, and easy to operate, making them perfect for gardens, farms, or emergency water access. Models like the Legacy Manual Well Pump and Locci Stainless Steel Hand Pump are popular choices. They feature durable materials such as stainless steel or PVC, ensuring longevity and resistance to corrosion. Shallow well pumps are cost-effective and require minimal maintenance, providing a reliable solution for small-scale water needs. Their simplicity makes them a practical choice for off-grid scenarios.

2.3 Emergency Backup Pumps

Emergency backup pumps are crucial for ensuring water access during power outages or natural disasters. Designed for reliability, they often feature lightweight and portable designs, such as the Legacy Emergency Hand Pump, which requires no assembly. These pumps can be quickly deployed, offering a simple and effective way to extract water manually. With durable materials like stainless steel, they withstand harsh conditions and provide peace of mind. Their ease of use makes them ideal for families and homesteaders seeking a dependable solution for unexpected situations.

Key Features of Manual Well Pumps

Manual well pumps are known for their durability, simplicity, and reliability. Key features include sturdy materials like stainless steel, modular designs for flexibility, and low maintenance requirements.

3.1 Construction Materials (Stainless Steel, PVC)

Manual well pumps are built with durable materials like stainless steel and PVC to ensure longevity. Stainless steel offers resistance to corrosion and rust, making it ideal for harsh environments. PVC, being lightweight and resistant to chemicals, provides a cost-effective alternative. These materials ensure the pump remains functional and safe for drinking water, even in extreme conditions. Proper material selection enhances both performance and lifespan, making manual pumps a reliable choice for well water access.

3.2 Modular Design for Flexibility

Manual well pumps often feature modular designs, allowing users to adapt the system to their needs. This flexibility enables starting with a manual configuration and later upgrading to motorized operation. Such designs accommodate varying well depths and water requirements, ensuring efficient performance. Modular components also simplify maintenance and customization, making the pump versatile for different environments and applications. This adaptability enhances the pump’s functionality, ensuring it remains a practical solution for both present and future needs.

3.3 Ease of Maintenance and Repair

Manual well pumps are designed for simplicity, making maintenance and repair straightforward. Fewer moving parts reduce wear and tear, minimizing the need for frequent servicing. Many models feature easy-to-access components, allowing users to replace or repair parts without specialized tools. This ease of maintenance ensures reliable operation, especially in off-grid settings where professional assistance may be unavailable. Regular checks and simple DIY fixes can extend the pump’s lifespan, providing consistent water access for years.

Top Models of Manual Well Pumps

Leading manual well pumps include the Simple Pump, Legacy, and Bison models, each offering durability and efficiency for various well depths and water needs.

4.1 Simple Pump Deep Well Hand Pump

The Simple Pump Deep Well Hand Pump is renowned for its reliability and versatility, capable of reaching static water levels up to 325 feet. Constructed from aerospace-grade stainless steel, it ensures durability and resistance to corrosion. Its modular design allows users to start with manual operation and easily upgrade to a motorized system if needed. This pump fits seamlessly into 2-inch wells or alongside submersible pumps in larger wells, making it a practical choice for both deep and shallow water access. Additionally, it operates smoothly in freezing conditions and requires minimal maintenance, ensuring consistent water supply during emergencies.

4.2 Legacy Manual Well Pump

The Legacy Manual Well Pump is a reliable backup solution for accessing water during emergencies or power outages. Designed for simplicity and effectiveness, it addresses common issues with traditional hand pumps, offering a user-friendly experience. Its lightweight and portable design makes it easy to install and operate, requiring no assembly. This pump is ideal for shallow or deep wells, providing consistent water access when needed most. It ensures peace of mind with its durable construction and ease of use, making it a practical choice for emergency preparedness.

4.3 Bison Pumps Stainless Steel Hand Pump

The Bison Pumps Stainless Steel Hand Pump is a high-quality, durable solution for accessing water from deep wells. Constructed from 304 stainless steel, it ensures longevity and resistance to rust. This pump operates smoothly, requiring minimal maintenance, and is designed to function in all weather conditions. Bison Pumps offers a lifetime warranty, reflecting their confidence in its reliability. Its tamper-proof security option adds an extra layer of protection, making it a trusted choice for off-grid water systems.

Installation and Setup

Proper installation of a manual well pump involves assessing well depth and water level, ensuring secure placement, and aligning components for optimal performance and reliable water access.

5.1 Assessing Well Depth and Water Level

Accurately measuring the static water level and well depth is crucial for proper manual pump installation. Use a measuring tape or weighted string to determine the distance from the well top to the water surface. This assessment ensures the pump is correctly sized and positioned, optimizing performance. Incorrect measurements can lead to inefficient pumping or system failure. Always verify well specifications and consult guidelines for precise calculations to match the pump’s capabilities with the well’s characteristics.

5.2 Step-by-Step Installation Guide

Begin by assembling the pump according to the manufacturer’s instructions. Attach the pump cylinder to the well casing, ensuring a secure fit. Insert the drop pipe into the well, connecting it to the pump rod. Align the handle and tighten all connections. Test the pump by lifting the handle to create suction. Check for leaks and ensure smooth operation. Proper installation ensures efficient water extraction and longevity of the pump. Follow all safety guidelines to avoid contamination or damage to the well system.

5.3 Tips for Optimal Pump Placement

Position the pump in a shaded area to prevent overheating and extend its lifespan. Ensure the pump is level and securely anchored to prevent shifting during use. Keep the surrounding area clear of debris to avoid contamination. For deep wells, align the pump handle at a comfortable height to reduce strain. Consider installing a protective cover to shield from harsh weather conditions. Proper placement enhances efficiency, safety, and durability of the manual well pump. Always follow local regulations and safety standards.

Maintenance and Troubleshooting

Regular lubrication of moving parts and checks for worn seals prevent leaks. Inspect rods and cylinders for corrosion. Address freezing by draining water. Replace damaged components promptly to ensure smooth operation.

6.1 Regular Maintenance Checks

Regular maintenance is crucial for extending the life of manual well pumps. Inspect the pump’s moving parts, such as rods and pistons, for wear or corrosion. Lubricate hinges and connections to ensure smooth operation. Check for leaks around seals and gaskets, replacing them if necessary. Additionally, examine the well casing and piping for damage or blockages. Cleaning the pump and surrounding area prevents debris buildup. Regular checks help identify issues early, preventing costly repairs and ensuring reliable water access.

6.2 Handling Freezing Conditions

Freezing temperatures can damage manual well pumps, so proper precautions are essential. Drain the pump and pipes during harsh winters to prevent ice formation. Use insulated pipes and protect the pump with a cover to shield it from cold. Some models, like stainless steel pumps, are designed to withstand freezing conditions. Regularly check for frost damage and ensure all components are securely fastened. Proper winterization ensures your pump remains functional year-round, providing reliable water access even in extreme cold;

6.3 Common Issues and Solutions

Common issues with manual well pumps include suction loss, seized parts, and leakage. Check for air leaks in pipes or worn seals to restore suction. Lubricate moving parts to prevent seizing. For leaks, tighten connections or replace worn gaskets. Regular maintenance, such as cleaning and inspecting components, can prevent these problems. Addressing issues promptly ensures consistent water flow and prolongs pump life. Always refer to the manufacturer’s guidelines for specific troubleshooting steps and solutions.

Benefits of Manual Well Pumps

Manual well pumps provide reliable water access during power outages, are cost-effective, and environmentally friendly. They ensure consistent water supply, enhancing self-sufficiency and safety for families and communities.

7;1 Reliability During Power Outages

Manual well pumps offer unparalleled reliability during power outages, ensuring continuous water access. Unlike electric pumps, they operate without electricity, making them indispensable in emergencies. Their simple design requires minimal maintenance, providing peace of mind during grid failures. With a manual pump, families can access clean water for drinking, cooking, and hygiene, even when the power is out. This independence is crucial for off-grid homes and emergency preparedness, ensuring water availability when it’s needed most.

7.2 Cost-Effectiveness and Longevity

Manual well pumps are a cost-effective solution for water access, offering long-term durability with minimal maintenance. Constructed from robust materials like stainless steel and PVC, they withstand harsh conditions and last for decades. Their simplicity reduces repair costs and extends lifespan. Unlike electric pumps, manual pumps have no energy expenses, making them a budget-friendly choice; This combination of low upkeep, reliability, and extended lifespan makes manual pumps a wise investment for homeowners seeking sustainable water solutions.

7.3 Environmental and Health Safety

Manual well pumps promote environmental sustainability by eliminating electricity use, reducing carbon footprints, and minimizing chemical contamination risks. Built with food-grade materials like stainless steel, they ensure safe drinking water. Their non-invasive operation preserves groundwater quality, making them an eco-friendly choice. Additionally, manual pumps avoid the hazards of electric shock and chemical leaks, safeguarding both health and the environment. This makes them a reliable option for households prioritizing safety and ecological responsibility.

Choosing the Right Manual Pump

Selecting the ideal manual pump involves assessing well depth, water needs, and pump capacity. Consider flow rates, material durability, and warranty for long-term reliability and optimal performance.

8.1 Considering Well Depth and Water Needs

When selecting a manual pump, assess your well’s depth and water requirements. Shallow wells (under 25 feet) need simpler pumps, while deeper wells require more robust models. Consider the static water level, the distance from the well top to the water surface. For deep wells, pumps with longer rods and higher suction power are essential. Matching pump capacity to water needs ensures efficient operation. Always check if the pump fits your well casing size for proper installation and functionality.

8.2 Comparing Flow Rates and Pumping Capacity

Flow rate and pumping capacity are critical for meeting water demands.Manual pumps vary in water output per stroke or minute, with deeper wells requiring higher capacity. For instance, pumps delivering 20 ounces per stroke are ideal for consistent use. Consider your household needs and well depth to choose a pump that balances effort and efficiency. Higher flow rates reduce pumping time, while lower capacities may suffice for smaller needs. Always match pump capacity to your specific requirements for optimal performance.

8.3 Evaluating Brand Reputation and Warranty

When selecting a manual well pump, brand reputation and warranty are crucial. Reputable brands like Simple Pump, Legacy, and Bison offer durable, high-quality products with excellent customer support. Look for warranties that cover parts and labor, ensuring long-term reliability. A trusted brand with a comprehensive warranty provides peace of mind, knowing your investment is protected. Research reviews and ratings to confirm the brand’s commitment to quality and customer satisfaction. This ensures your pump performs reliably for years to come.

singer 2263 manual

Welcome to the Singer 2263 sewing machine, a versatile device designed for various sewing tasks. This manual provides essential guidance for optimal use and troubleshooting.

1.1. Welcome to Singer 2263

Welcome to the Singer 2263 sewing machine! This versatile and portable device is designed for a variety of sewing tasks, from basic repairs to creative projects. With 23 built-in stitches, including utility, decorative, and dressmaking options, it offers flexibility for every sewer. The machine features a 4-step buttonhole, free arm sewing, and an automatic bobbin winding system for convenience. Whether you’re a beginner or an experienced sewer, the Singer 2263 is here to help you create with ease and precision.

1.2. Purpose of the Manual

This manual is designed to guide you through the safe and effective use of your Singer 2263 sewing machine. It provides detailed instructions for setting up, operating, and maintaining the machine. The manual covers essential features like threading, bobbin installation, and troubleshooting common issues. Additionally, it highlights safety precautions and offers tips for optimizing your sewing experience. By following this guide, you can fully utilize the machine’s capabilities and enjoy a seamless sewing experience. The manual is also available online for easy access and reference.

Safety Instructions

Always follow safety guidelines to prevent accidents. Keep children away from the machine and avoid handling electrical parts with wet hands. Ensure proper ventilation and avoid overheating.

2.1. General Safety Precautions

Always unplug the machine when not in use or during maintenance. Keep the work area clean and well-lit to avoid tripping or eye strain. Ensure children are supervised when near the machine. Never operate the Singer 2263 with loose clothing or long jewelry that could get caught. Use only Singer-recommended accessories to prevent damage. Regularly inspect cords and plugs for damage. Avoid sewing over pins to prevent accidents.

2.2. Electrical Safety

Unplug the machine before cleaning or maintaining it. Avoid using the machine near water or in damp environments. Ensure the power cord is undamaged and properly connected. Never touch electrical parts with wet hands. Use only the voltage specified in the manual. Keep the machine away from heat sources or open flames. If the machine malfunctions, disconnect it immediately and contact a professional. Proper grounding ensures safety; use a grounded outlet to prevent electric shock.

Main Parts of the Machine

The Singer 2263 features a needle threader, thread take-up lever, thread cutter, and presser foot. The free arm allows easy sewing of cuffs and collars.

3.1. Exterior Components

The Singer 2263 features a durable exterior with a free arm for versatile sewing. It includes a built-in accessory compartment, a transparent bobbin cover, and a reverse stitch lever. The machine’s exterior components are designed for ease of use, with a front-loading bobbin system and a convenient thread cutter. The compact design allows for easy portability, while the adjustable stitch length dial and presser foot ensure precise control over fabric handling. These components enhance functionality and streamline the sewing process;

3.2. Interior Components

The Singer 2263’s interior includes essential mechanisms like the bobbin case, feed dogs, and stitch regulator. The automatic needle threader simplifies threading, while the take-up lever controls thread flow. The interior components work together to ensure smooth fabric movement and consistent stitching. Regular maintenance of these parts, such as cleaning and oiling, is crucial for optimal performance and longevity of the machine. Proper care ensures reliable operation and high-quality sewing results for years to come.

Setting Up the Machine

Set up your Singer 2263 by threading the machine and winding the bobbin. Use the automatic needle threader for convenience and ensure proper thread tension for smooth sewing.

4.1. Threading the Machine

Threading the Singer 2263 is straightforward. Begin by placing the thread on the spool pin. Guide the thread through the take-up lever, then through the tension discs. Next, insert the thread into the needle bar and pull gently to secure it. Use the automatic needle threader for convenience. Ensure the thread is taut but not overly tight. Proper threading is essential for smooth stitching. Once threaded, proceed to wind and install the bobbin for sewing.

4.2. Winding and Installing the Bobbin

To wind the bobbin, place it on the winder and draw thread from the spool. Guide the thread through the bobbin tension guide. Hold the thread tail and press the foot pedal gently. Once wound, cut the thread and remove the bobbin. To install, open the bobbin compartment, insert the bobbin, and pull thread through the slot. Ensure it’s securely seated and aligned for smooth stitching. Proper installation is crucial for balanced stitches and efficient sewing.

Basic Sewing Techniques

Master essential sewing skills with the Singer 2263, including straight stitch for basic seams and backstitch for reinforcing. These techniques ensure strong, professional-looking results for various projects.

5.1. Straight Stitch Sewing

The Singer 2263 allows for straightforward straight stitch sewing, ideal for basic seams and repairs. To begin, ensure the machine is set to the straight stitch option; Thread the machine and bobbin correctly, then align fabric edges under the presser foot. Gently guide the fabric as it moves, maintaining consistent tension. This stitch is perfect for linens, cotton, and other lightweight materials, providing a clean, professional finish. It’s a great starting point for beginners and experienced sewists alike.

5.2. Backstitching

Backstitching on the Singer 2263 is used to reinforce seams at the beginning and end of stitching. Engage the reverse stitch lever to sew a few stitches backward. This ensures a secure finish, preventing unraveling. Guide the fabric steadily, maintaining consistent tension. Backstitching is particularly useful for heavy fabrics or stress points in garments. It adds durability and a professional touch to your sewing projects, ensuring long-lasting results.

Singer 2263 Features

The Singer 2263 offers a 4-step buttonhole, free arm sewing, and adjustable stitch length. It includes a built-in needle threader and reverse stitch lever for convenience.

6.1. 4-Step Buttonhole

The Singer 2263 features a convenient 4-step buttonhole function, designed to simplify the process of creating buttonholes. This feature guides the user through four straightforward steps, ensuring consistent and professional results. The machine automatically adjusts settings for precise stitching, making it easy to achieve uniform buttonholes. This feature is particularly useful for garments, home decor, and crafts, saving time and effort compared to manual buttonhole creation. The 4-step process ensures accuracy and reliability, making it a standout feature for sewists of all skill levels.

6.2. Free Arm Sewing

The Singer 2263 includes a free arm feature, providing enhanced versatility for sewing cylindrical or hard-to-reach areas like cuffs, collars, and pant hems. By detaching the auxiliary bed, the free arm allows easy access and better control when sewing curved or narrow spaces. This feature is particularly useful for delicate fabrics and intricate projects, ensuring precision and ease. It simplifies tasks that would otherwise be challenging, making the Singer 2263 a practical choice for both beginners and experienced sewists.

Maintenance and Troubleshooting

Regularly clean and oil the machine to ensure smooth operation; Check for lint buildup and align needles properly for optimal performance and minimal repairs.

7.1. Regular Maintenance

Regular maintenance ensures the Singer 2263 operates smoothly. Clean the machine by removing lint and debris, especially around the bobbin area. Lightly oil the internal mechanisms to prevent rust and friction. Check the needle for damage and replace it if necessary. Ensure the presser foot is securely attached and the stitch length is adjusted properly. Regularly inspect the power cord for damage and avoid overloading the machine. Proper care extends the machine’s lifespan and performance.

7.2. Common Issues and Solutions

Common issues with the Singer 2263 include thread bunching, fabric not feeding evenly, or the needle breaking. To resolve thread bunching, check thread tension and clean lint from the bobbin area. If fabric isn’t feeding, ensure the presser foot is lowered and the feed teeth are unobstructed. For broken needles, verify proper needle alignment and use the correct needle type. Bobbin issues can be fixed by ensuring it’s properly seated and threaded. Regular maintenance helps prevent these problems.

Additional Resources

Visit Singer’s official website for online support, downloadable manuals, and troubleshooting guides. Access resources like stitch guides and FAQs for enhanced sewing experiences with Singer 2263.

8.1. Online Support

Visit Singer’s official website for comprehensive online support, including downloadable manuals, FAQs, and troubleshooting guides. Access resources like stitch charts and video tutorials to enhance your sewing experience. The Singer 2263 manual is available in PDF format for easy reference. Additionally, explore community forums and customer support channels for personalized assistance and tips from experienced users. This ensures you maximize the potential of your Singer 2263 sewing machine with reliable online resources.

8.2. Downloading the Manual

The Singer 2263 manual is readily available for download in PDF format from Singer’s official website. Visit the support section, enter your machine model, and follow the prompts to access the manual. This document includes detailed instructions, diagrams, and troubleshooting tips. Ensure you download the correct version for your Singer 2263 to enjoy a seamless sewing experience. The PDF format allows easy printing or digital storage for quick reference whenever needed.

pastor’s aide ministry manual

Welcome to the Pastor’s Aide Ministry Manual, a guide to supporting pastoral leadership and fostering unity within the church community through structured strategies and spiritual preparation.

Understanding the Role of a Pastor’s Aide

A Pastor’s Aide serves as a vital support system for the pastor, ensuring the ministry operates smoothly. This role involves facilitating communication, managing logistical tasks, and maintaining confidentiality. The aide acts as a liaison between the pastor and congregation, addressing concerns and fostering unity. They also assist in organizing events, preparing materials, and overseeing administrative duties. Spiritual grounding is essential, as the aide must pray for the pastor and congregation, embodying Christ-like servant leadership. By relieving the pastor of administrative burdens, the Pastor’s Aide enables the pastor to focus on spiritual guidance and community outreach, fostering a cohesive and thriving church environment.

Importance of a Structured Ministry Manual

A structured ministry manual is essential for ensuring clarity, consistency, and efficiency in pastoral support. It provides a clear roadmap for the Pastor’s Aide, outlining roles, responsibilities, and best practices. By standardizing procedures, the manual minimizes confusion and ensures seamless coordination between the Pastor’s Aide, the pastor, and the congregation. It also serves as a valuable training tool for new members, fostering unity and alignment with the church’s mission. A well-organized manual enhances accountability, ensuring tasks are completed effectively and ethically. Additionally, it preserves institutional knowledge, preventing gaps during transitions. Ultimately, a structured manual strengthens the ministry’s foundation, enabling the Pastor’s Aide to serve with confidence and purpose.

Forming the Pastor Search Committee

Forming a Pastor Search Committee involves selecting dedicated members, defining roles, and preparing the team to prayerfully seek God’s guidance in identifying the right pastoral leader.

Key Steps in Establishing the Committee

  • Identify and select committee members based on their spiritual maturity, leadership skills, and commitment to the church’s vision.
  • Define clear roles and responsibilities for each member to ensure accountability and effective collaboration.
  • Establish a prayerful foundation, seeking God’s guidance throughout the process.
  • Develop a structured plan, including timelines and milestones, to keep the committee focused and organized.
  • Engage the congregation through regular updates and opportunities for feedback, ensuring transparency and unity.
  • Emphasize confidentiality to protect sensitive information and maintain trust within the committee and the church.

Qualifications and Characteristics of Committee Members

Effective committee members should demonstrate spiritual maturity, a deep prayer life, and a strong commitment to the church’s vision and mission. They must possess excellent communication and interpersonal skills to foster unity and collaboration. Integrity, confidentiality, and discernment are essential, as they will handle sensitive information and make critical decisions. Members should also exhibit leadership qualities, a willingness to serve, and the ability to represent the diverse needs of the congregation. A clear understanding of the church’s values and a passion for its growth are vital. Above all, they should seek God’s guidance and remain humble, ensuring decisions align with His will.

Identifying the Needs of the Congregation

Assessing community needs and aligning them with the church’s vision ensures a pastor who meets spiritual and practical demands, fostering unity and growth.

Assessing Community Needs and Church Vision

Understanding the congregation’s needs involves evaluating demographic trends, spiritual demands, and community challenges. This process ensures the church’s vision aligns with its mission and the pastor’s role. Tools like surveys, focus groups, and outreach programs help gather insights. By engaging with the community, the church identifies gaps in ministry and areas for growth. Aligning these needs with the church’s vision ensures a cohesive strategy for selecting a pastor who can address both spiritual and practical demands. This collaborative approach fosters unity and prepares the congregation for a pastor who embodies their values and goals, creating a strong foundation for future ministry.

Engaging the Congregation in the Search Process

Active involvement of the congregation strengthens unity and ensures everyone’s voice is heard. Regular updates, prayer sessions, and feedback opportunities foster transparency and trust. Surveys and town hall meetings allow members to express needs and expectations. Encouraging participation in decision-making processes, such as nominating candidates, builds ownership. The Pastor’s Aide Ministry Manual provides structured strategies to guide this engagement, ensuring the congregation feels valued and informed throughout the search journey.

The Role of the Pastor’s Aide in the Search Process

The Pastor’s Aide provides critical support by facilitating communication, coordinating tasks, and ensuring the search process aligns with the church’s vision and community needs.

Supporting the Pastor and the Search Committee

The Pastor’s Aide plays a vital role in providing administrative and logistical support to both the pastor and the search committee. This includes managing schedules, preparing meeting materials, and ensuring clear communication among all parties. By handling these tasks, the Pastor’s Aide allows the pastor and committee to focus on their primary responsibilities. Additionally, the Pastor’s Aide acts as a liaison, facilitating feedback and updates between the committee and the congregation. Their efforts help maintain unity and trust, which are essential for a smooth and successful search process. Their role is both strategic and supportive, ensuring the church’s needs are met with care and efficiency.

Facilitating Communication and Feedback

Effective communication is the cornerstone of a successful pastor search process, and the Pastor’s Aide plays a central role in facilitating this; By acting as a bridge between the search committee, the pastor, and the congregation, the Pastor’s Aide ensures that information flows smoothly and transparently. This includes organizing meetings, circulating updates, and addressing questions or concerns. Additionally, the Pastor’s Aide helps gather and relay feedback from the congregation, ensuring their voices are heard and valued. Regular communication updates and feedback loops not only maintain trust but also foster unity and alignment within the church community. This role is essential for a cohesive and successful search process.

Recruiting and Evaluating Potential Candidates

Develop effective strategies to identify and assess candidates, ensuring alignment with the church’s mission and needs while maintaining confidentiality and fairness throughout the process.

Developing a Strategy for Candidate Recruitment

Effective candidate recruitment begins with prayer and a clear understanding of the church’s needs. Define the pastor’s role, qualifications, and desired traits aligned with the congregation’s vision. Utilize diverse channels such as church networks, seminaries, and online platforms to reach potential candidates. Establish a structured process for resume review, interviews, and reference checks. Ensure confidentiality and fairness throughout the process. Engage the congregation in prayer and seek feedback to foster unity and trust. Leverage technology and professional recruitment tools to streamline efforts. Prioritize spiritual alignment, experience, and relational skills to identify the best fit for the church’s mission and community needs.

Evaluating Candidates’ Qualifications and Fit

Evaluating candidates involves assessing their theological alignment, pastoral experience, and relational skills. Review resumes, sermons, and references to ensure credibility and suitability. Conduct interviews to gauge their vision, leadership style, and ability to connect with the congregation. Use assessment tools to measure compatibility with the church’s mission and values. Ensure confidentiality throughout the process to maintain trust. Seek feedback from the search committee and congregation to identify the best fit. Prioritize candidates who demonstrate a strong spiritual foundation, emotional intelligence, and a passion for serving the community. This thorough evaluation ensures the chosen pastor aligns with the church’s needs and fosters long-term ministry success.

Spiritual Preparation and Prayer

Spiritual preparation and prayer are vital for seeking God’s guidance and building unity. Regular prayer fosters trust and clarity in the decision-making process.

The Importance of Prayer in the Search Process

Prayer is central to the pastor search process, ensuring decisions align with God’s will. It fosters unity, clarity, and trust among committee members and the congregation. Through prayer, the church seeks divine wisdom, guidance, and discernment in identifying the right leader. Regular, intentional prayer helps maintain focus on spiritual goals and strengthens the committee’s reliance on God. Praying together builds fellowship and trust, essential for a unified decision. By prioritizing prayer, the church demonstrates faith in God’s plan and timing, ensuring a leader who aligns with its vision and needs.

Building Unity and Trust Within the Committee

Building unity and trust within the Pastor Search Committee is crucial for a successful and harmonious search process. Open communication, active listening, and transparency foster an environment of mutual respect and collaboration. Committee members should prioritize shared goals and maintain a spirit of humility, recognizing that the task is a collective spiritual endeavor. Regular team-building activities and prayer together strengthen bonds and ensure alignment in purpose. Trust is cultivated when members feel heard and valued, leading to a cohesive unit that reflects the unity of Christ. A unified committee not only enhances decision-making but also serves as a positive example for the congregation.

Onboarding the New Pastor

Onboarding the new pastor involves creating a smooth transition process, ensuring they are well-integrated into the church community and supported in their ministry through collaboration and prayer.

Creating a Smooth Transition Process

Creating a smooth transition process involves the Pastor’s Aide coordinating with the search committee to ensure the new pastor is well-integrated into the church. This includes organizing orientation sessions, introducing key church members, and setting up meetings with ministry leaders. The Pastor’s Aide should also facilitate open communication between the new pastor and the congregation, addressing any concerns promptly. Additionally, ensuring confidentiality and managing sensitive information about candidates is crucial. By fostering a supportive environment, the Pastor’s Aide helps the new pastor transition effectively, enabling them to focus on their ministry and build strong relationships within the church community.

Supporting the New Pastor’s Ministry

The Pastor’s Aide plays a vital role in supporting the new pastor’s ministry by fostering open communication and ensuring the congregation’s needs are met. This involves organizing feedback sessions, maintaining confidentiality, and addressing concerns promptly. The Pastor’s Aide also facilitates prayer and spiritual guidance, helping the pastor build trust and unity within the church. By encouraging collaboration and providing necessary resources, the Pastor’s Aide enables the new pastor to focus on their ministerial duties effectively, ensuring a harmonious and thriving church community.

seenda wireless keyboard manual

Welcome to the Seenda Wireless Keyboard manual! This guide introduces the ISJ-DJC03, a versatile, 7-color backlit wireless keyboard designed for seamless connectivity and enhanced productivity․

1․1 Overview of the Seenda Wireless Keyboard

The Seenda Wireless Keyboard, model ISJ-DJC03, is a sleek and functional peripheral designed for enhanced typing experiences․ It features a 7-color backlit design with three brightness levels, offering a visually appealing and customizable setup․ Built for convenience, it supports multi-device connectivity, allowing users to pair with up to three devices simultaneously․ The keyboard also includes a power-saving mode that activates after five minutes of inactivity, ensuring extended battery life․ Its compact design and user-friendly interface make it ideal for both personal and professional use, catering to a wide range of needs․

1․2 Importance of the User Manual

This manual is essential for maximizing the Seenda Wireless Keyboard’s potential․ It provides detailed instructions for setup, pairing, and troubleshooting, ensuring smooth operation․ The guide explains advanced features like multi-device connectivity and power-saving modes, helping users customize their experience․ By following the manual, users can resolve common issues and maintain optimal performance․ It also offers insights into battery management, backlight customization, and compatibility with various operating systems, making it a vital resource for both new and experienced users of the Seenda Wireless Keyboard․

Key Features of the Seenda Wireless Keyboard

This manual is crucial for understanding and utilizing the Seenda Wireless Keyboard effectively․ It provides detailed setup instructions, troubleshooting tips, and insights into advanced features like multi-device connectivity and power-saving modes․ The manual ensures users can resolve common issues, customize settings, and maintain optimal performance․ It serves as an essential guide for both new users and those seeking to unlock the keyboard’s full potential, ensuring a seamless and efficient experience․

2․1 7-Color Backlit Design

The Seenda Wireless Keyboard features a stunning 7-color backlit design, offering vibrant illumination for enhanced visibility in low-light environments․ With three adjustable brightness levels, users can customize the backlighting to suit their preferences․ The keyboard automatically turns off the backlight after 5 minutes of inactivity to conserve battery life․ Pressing any key reactivates the backlight, ensuring seamless functionality․ This feature not only enhances aesthetics but also improves typing accuracy and comfort during late-night tasks or in dimly lit spaces․

2․2 Multi-Device Connectivity

The Seenda Wireless Keyboard supports multi-device connectivity, allowing users to connect up to three devices simultaneously․ This feature is particularly useful for individuals who need to switch between multiple computers, laptops, or other compatible devices seamlessly․ The keyboard uses advanced 2․4GHz wireless technology to ensure stable and interference-free connections․ With a simple setup process, users can pair their devices and toggle between them effortlessly, enhancing productivity and convenience for both personal and professional use․

2․3 Power-Saving Mode

The Seenda Wireless Keyboard features a power-saving mode that automatically activates after 5 minutes of inactivity, turning off the backlight and conserving battery life․ This energy-efficient design ensures extended usage without frequent recharging․ To reactivate the keyboard, simply press any key, restoring functionality instantly․ This mode is ideal for users seeking a balance between performance and battery longevity, making it suitable for both home and office environments while maintaining productivity and convenience․

Compatibility and System Requirements

The Seenda Wireless Keyboard is compatible with Windows, Mac, and iOS systems, ensuring seamless connectivity across various devices, including MacBooks, iMacs, and iPhones․

3․1 Supported Operating Systems

The Seenda Wireless Keyboard is compatible with a wide range of operating systems, including Windows, Mac OS, and iOS․ This versatility allows users to seamlessly integrate the keyboard with their preferred devices, whether it’s a Windows PC, MacBook, or iPad․ The keyboard automatically adapts to the connected device’s operating system, ensuring optimal functionality․ Special function keys are programmable to meet specific needs, while standard keys provide consistent performance across all supported systems․ For detailed compatibility, refer to the user manual specific to your keyboard model․

3․2 Devices Supported (Windows, Mac, iOS)

The Seenda Wireless Keyboard is designed to work seamlessly with a variety of devices, including Windows PCs, MacBooks, iMacs, Mac Minis, iPhones, and iPads․ Its 2-in-1 Windows and Mac OS layouts ensure compatibility across different operating systems․ Additionally, the keyboard supports multi-device connectivity, allowing users to switch between up to three devices effortlessly․ This versatility makes it an ideal choice for those who need a single keyboard for multiple devices, whether for work, entertainment, or everyday use․ The keyboard’s universal design ensures a smooth typing experience across all supported platforms․

Setting Up the Seenda Wireless Keyboard

Setting up your Seenda Wireless Keyboard is quick and straightforward․ Insert the batteries, plug in the USB receiver, and wait for automatic detection․ The keyboard is ready to use once the power LED flashes and connects successfully․

4․1 Unboxing and Initial Setup

Upon unboxing your Seenda Wireless Keyboard, you’ll find the keyboard, USB receiver, user manual, and battery requirements․ Ensure all components are included and undamaged․ Insert the provided batteries or recharge if necessary․ Plug the USB receiver into your device for automatic detection․ The keyboard is plug-and-play, with no additional software needed for basic functionality․ Power on the keyboard, and it will automatically connect to your device․ Follow the manual for specific pairing instructions if required․ Your keyboard is now ready for use with your computer, tablet, or other compatible devices․

4․2 Pairing the Keyboard with Your Device

To pair the Seenda Wireless Keyboard, start by plugging the USB receiver into your device․ Turn on the keyboard and ensure it is in pairing mode․ For Bluetooth models, press and hold the Bluetooth key until the backlight flashes․ On your device, navigate to Bluetooth settings and select the keyboard from the available devices․ Once connected, the backlight will stabilize, indicating successful pairing․ If using the USB receiver, the connection should establish automatically․ Follow these steps to ensure a smooth and secure connection to your device․

4․3 Troubleshooting Connection Issues

If the keyboard fails to connect, ensure the USB receiver is securely plugged in or Bluetooth is enabled․ Restart both the keyboard and device․ Check that the keyboard is in pairing mode, with the backlight flashing․ Replace the batteries if low power is indicated․ For Bluetooth, clear old pairings and reconnect․ Ensure no interference from other devices․ If issues persist, reset the keyboard by holding the power button for 10 seconds․ Refer to the manual for additional troubleshooting steps to resolve connectivity problems effectively․

Battery Life and Power Management

The Seenda Wireless Keyboard offers a rechargeable battery with up to 6 months of life․ It features a power-saving mode, turning off after 5 minutes of inactivity․

5․1 Battery Type and Life Expectancy

The Seenda Wireless Keyboard uses a rechargeable lithium-ion battery, offering a long lifespan and reliable performance․ With typical usage, the battery can last up to six months on a single charge․ The keyboard’s power-saving features, such as automatically turning off the backlight after five minutes of inactivity, help extend battery life․ Proper charging and maintenance ensure the battery remains efficient over time, providing consistent wireless functionality without frequent recharging needs․

5․2 Power-Saving Features

The Seenda Wireless Keyboard is equipped with advanced power-saving features to maximize battery life․ After five minutes of inactivity, the backlight automatically turns off, and the keyboard enters a low-power mode․ This ensures minimal battery consumption when the device is not in use․ Additionally, the keyboard’s intelligent power management system optimizes energy use, allowing for extended periods of operation without recharging․ These features make the keyboard both efficient and convenient for daily use․

5․3 Recharging the Battery

To recharge the Seenda Wireless Keyboard, connect the USB-C cable to the keyboard’s charging port and the other end to a compatible charger or USB port․ The keyboard uses a rechargeable lithium-ion battery, and charging typically takes 2-3 hours for a full charge․ The LED indicator will light up during charging and turn off when complete․ Avoid overcharging to maintain battery health․ Ensure the keyboard is turned off during charging for optimal performance and to prevent unnecessary power consumption․

Customization Options

The Seenda Wireless Keyboard offers customization options, allowing users to adjust backlight brightness and colors․ Function keys can also be personalized for enhanced productivity․

6․1 Adjusting Backlight Brightness and Colors

The Seenda Wireless Keyboard features customizable backlight settings․ Users can cycle through seven vibrant colors using the designated key․ Brightness levels are adjustable in three stages—low, medium, and high—ensuring optimal visibility in any environment․ The backlight automatically turns off after five minutes of inactivity to conserve battery life․ To reactivate, simply press any key․ This feature enhances both functionality and aesthetic appeal, catering to individual preferences and work styles․

6․2 Customizing Function Keys

The Seenda Wireless Keyboard allows for easy customization of function keys to suit your needs․ Press the Fn key to access special features printed on each key, such as media controls and brightness adjustments․ For standard function key usage, disable the Fn lock․ Customize keys for specific tasks, such as opening apps or adjusting volume, to enhance productivity․ Refer to the manual for detailed instructions on key remapping and optimizing your workflow with personalized shortcuts․

Maintenance and Care

Regularly clean the keyboard with a soft cloth and avoid liquid exposure․ Store in a dry place and transport safely to maintain functionality and appearance․

7․1 Cleaning the Keyboard

To maintain your Seenda Wireless Keyboard, gently wipe it with a soft, dry cloth․ For stubborn dust, use compressed air to clean between keys․ Avoid liquids, as they may damage electronics․ If necessary, dampen the cloth slightly but ensure no moisture reaches internal components․ Regular cleaning prevents dust buildup and ensures optimal performance․ Allow the keyboard to dry completely before reuse․ This simple maintenance routine extends the lifespan and keeps your keyboard functioning smoothly․

7․2 Storage and Transportation Tips

When storing or transporting your Seenda Wireless Keyboard, place it in a protective case to prevent scratches․ Avoid extreme temperatures and humidity․ Store the keyboard flat to maintain key alignment․ Ensure the battery is fully charged or removed to prevent leakage․ During transport, keep the keyboard away from heavy objects to avoid damage․ Always use the original packaging or a padded bag for extra protection․ Proper storage ensures your keyboard remains in excellent condition for future use․

Advanced Features

The Seenda Wireless Keyboard offers advanced features like multi-device connectivity, allowing seamless switching between up to three devices․ Special function keys provide quick access to media controls and shortcuts, enhancing productivity and convenience for users․

8․1 Switching Between Connected Devices

The Seenda Wireless Keyboard allows seamless switching between up to three connected devices․ Users can toggle between devices using dedicated hotkeys, ensuring efficient multitasking․ The keyboard supports Bluetooth and USB receiver connections, enabling compatibility with Windows, Mac, iOS, and iPadOS systems․ Simply press the corresponding hotkey to switch devices instantly․ This feature is ideal for professionals and home users needing to manage multiple screens or devices simultaneously․ Ensure your keyboard is in Bluetooth mode for this functionality, and refer to the manual for pairing instructions․

8․2 Using Special Function Keys

The Seenda Wireless Keyboard features special function keys designed to enhance user experience․ These keys provide shortcuts for media control, brightness adjustment, and device switching․ To access these features, press the Fn key in combination with the corresponding function keys (F1-F12)․ The keyboard also supports standard function key operations, allowing users to customize their workflow․ Ensure your device is properly connected and refer to the manual for detailed instructions on optimizing these features for your specific setup․

9․1 Final Tips for Optimal Use

  • Regularly clean the keyboard to maintain performance and hygiene․
  • Adjust the backlight settings to suit your environment for better visibility․
  • Use the power-saving mode to extend battery life during inactivity․
  • Explore all function keys to unlock additional features and shortcuts․
  • Keep the keyboard charged and avoid over-discharging the battery․
  • Pair the keyboard with multiple devices for seamless switching․
  • Store the keyboard in a protective case when not in use․
  • Refer to the manual for troubleshooting common connection issues․
  • Stay updated with the latest firmware for enhanced performance․

e30 manual transmission swap

The E30 manual transmission swap is a popular modification among BMW enthusiasts, enhancing performance and driver engagement. It involves replacing the automatic gearbox with a manual unit, offering better control and precision. While challenging, the swap is rewarding for those seeking an immersive driving experience.

1.1 Overview of the E30 Manual Transmission Swap

The E30 manual transmission swap is a complex but rewarding process, converting an automatic BMW E30 to a manual setup. It involves replacing the automatic gearbox with a manual transmission, such as the popular Getrag 260, and adapting necessary components. This swap enhances drivetrain responsiveness and driver engagement, appealing to enthusiasts seeking a more immersive driving experience.

1.2 Benefits of Converting from Automatic to Manual

Converting an E30 to manual offers improved control, increased fuel efficiency, and enhanced driving performance. Manual transmissions typically weigh less and provide better acceleration; Drivers also experience a more engaging connection to the vehicle, making it ideal for enthusiasts seeking a sportier feel and improved handling. Additionally, manual swaps can boost resale value among BMW purists.

Choosing the Right Manual Transmission

Selecting the right manual transmission for your E30 involves considering compatibility, performance needs, and durability. The Getrag 260 is a popular choice for its reliability and smooth shifting.

2.1 Popular Transmission Options for E30

The Getrag 260 is the most popular choice for the E30 swap, known for its durability and smooth shifting. Other options include the Getrag 240 and ZF 5-speed, offering similar compatibility. These transmissions are widely available and trusted for their performance and reliability in the E30 chassis.

2.2 Getrag 260 Transmission: Features and Compatibility

The Getrag 260 is a 5-speed manual transmission designed for BMWs, offering smooth gear engagement and durability. It’s compatible with most E30 models, including the 325i and 318i, and pairs well with the M20 and M40 engines. Its compact design and robust construction make it the ideal choice for enthusiasts seeking a reliable and performance-oriented manual swap.

Preparation for the Swap

Preparation is crucial for a successful E30 manual transmission swap. Gather tools, parts, and ensure the vehicle is ready for disassembly and component replacement.

3.1 Tools and Equipment Needed

A successful E30 manual transmission swap requires specific tools. Essential items include a socket set, wrenches, jack stands, transmission jack, and clutch alignment tool. Additional specialized tools may be necessary for disassembly and reassembly.

3.2 Essential Parts and Components

The E30 manual transmission swap requires several key components, including a compatible manual transmission, clutch kit, driveshaft, and linkage. Additional parts like a clutch pedal assembly, master and slave cylinders, and hydraulic lines are necessary. Electrical components such as a reverse light switch and wiring harness may also be needed for proper functionality.

3.3 Preparing the Vehicle for Transmission Removal

Before removing the transmission, disconnect the battery and drain the fluid to prevent spills. Raise the vehicle on jack stands for access. Remove surrounding components like the exhaust and heat shields. Label wiring and connectors for easy reconnection later. Ensure all necessary tools and equipment are within reach to streamline the process.

Removing the Automatic Transmission

Removing the automatic transmission requires careful preparation, specialized tools, and mechanical expertise. Ensure the vehicle is securely supported and components are properly disconnected. This step is critical for a smooth swap.

4.1 Step-by-Step Process for Transmission Removal

Start by disconnecting the battery and draining the transmission fluid. Remove the driveshaft and support the transmission with a jack. Disconnect electrical connectors, hydraulic lines, and mount bolts. Carefully lower the transmission and slide it out. This process requires precision to avoid damage to surrounding components. Ensure all parts are labeled for reinstallation later.

4.2 Disconnecting Electrical and Hydraulic Components

Begin by disconnecting the electrical connectors from the transmission, such as the reverse light switch and speed sensor. Use a wrench to release hydraulic lines, ensuring minimal fluid leakage. Cap lines immediately to prevent contamination. Carefully label all connectors and lines for easy reconnection later; Avoid damaging wiring or hoses during removal to ensure a smooth reinstallation process.

Installing the Manual Transmission

Installing the manual transmission involves carefully aligning and securing the Getrag 260, ensuring proper fitment and connection points for a seamless swap experience.

5.1 Mounting the Manual Transmission

Mounting the manual transmission requires precise alignment with the engine and chassis. Ensure the Getrag 260 is securely fastened using the correct bolts and spacers. Properly position the transmission jack to stabilize the unit during installation. Verify that all mounting points are correctly aligned to avoid damage or misalignment. This step is critical for a smooth and successful swap.

5.2 Connecting the Driveshaft and Linkage

Connecting the driveshaft and linkage requires careful alignment with the manual transmission. Ensure the driveshaft is securely fastened to the transmission using the correct hardware. Properly attach the linkage to the shifter mechanism, adjusting for smooth gear engagement. Verify all connections are tight and free from play to ensure reliable operation and prevent vibrations or misalignment issues during driving.

Clutch Installation and Setup

Clutch installation involves removing the old clutch and aligning the new unit with the flywheel. Ensure proper alignment pins are used for accurate placement and secure the clutch kit. Tighten the pressure plate evenly to avoid warping. Connect the clutch slave cylinder and bleed the system to remove air bubbles for smooth engagement.

6.1 Choosing the Right Clutch Kit

Choosing the right clutch kit is crucial for optimal performance; Consider your driving style and conditions. OEM kits offer reliability, while performance or ceramic clutches provide enhanced grip for spirited driving. Always match the clutch kit to your transmission and engine specifications for seamless integration and maximum efficiency.

6.2 Installing the Clutch and Pressure Plate

Installing the clutch requires precision to ensure proper alignment and functionality. Attach the pressure plate to the flywheel, then carefully place the clutch disc. Use alignment tools to center the disc accurately. Tighten the pressure plate bolts evenly in a star pattern to avoid warping. Ensure all components are clean and free from grease for optimal engagement.

Wiring and Electronics Considerations

Adapting wiring for manual transmission involves reconfiguring the reverse light circuit and clutch switch connections. Ensure proper electrical compatibility to maintain functionality and avoid system errors.

7.1 Understanding the Reverse Light Switch Wiring

The reverse light switch wiring is crucial for proper functionality. It activates the reverse lights when the transmission is in reverse gear. For a manual swap, the switch must be correctly connected to the new transmission’s reverse gear position. Improper wiring can lead to malfunctioning lights, potentially causing safety issues or legal problems during inspections.

7.2 Adapting Electrical Connections for Manual Transmission

Adapting electrical connections for a manual transmission involves identifying and reconfiguring key connectors. The transmission control module may need adjustments to recognize the new manual setup. Proper wiring ensures smooth operation of essential systems like reverse lights and speed sensors. Precise connections are critical to avoid electrical malfunctions and ensure reliability. Consult a wiring diagram or specialist for accuracy.

Pedal Assembly Installation

Installing the pedal assembly involves mounting the clutch pedal and ensuring proper alignment with the manual transmission components. Secure the assembly and connect the linkage for smooth operation.

8.1 Installing the Clutch Pedal Assembly

The clutch pedal assembly installation begins by attaching the pedal to the firewall using the provided hardware. Ensure all bolts are securely tightened to prevent movement. Next, connect the pedal rod to the master cylinder, aligning it properly with the clutch linkage. Proper alignment is crucial for smooth engagement and consistent pedal feel.

8.2 Adjusting the Clutch Pedal and Linkage

Adjusting the clutch pedal and linkage ensures proper engagement and disengagement. Start by locating the adjustment points on the pedal and linkage. Tighten or loosen the connecting rod to achieve the desired pedal height and free play. Once set, test the clutch engagement by depressing the pedal fully and checking for smooth operation. Fine-tune as needed for optimal performance.

Bleeding the Clutch System

Bleeding the clutch system is essential to remove air bubbles, ensuring proper hydraulic pressure. Use a pressure bleeder for efficiency and follow manufacturer instructions for optimal results.

9.1 Importance of Proper Clutch Bleeding

Proper clutch bleeding ensures optimal hydraulic system performance by eliminating air bubbles. This guarantees smooth engagement and consistent pedal feel, preventing issues like spongy pedals or incomplete disengagement. Air in the system can lead to unreliable clutch operation, making it crucial for both safety and driving performance to bleed the system thoroughly after installation or maintenance.

9.2 Step-by-Step Bleeding Process

Bleeding the clutch system involves using a pressure bleeder or manual pumping of the pedal to eliminate air bubbles. Start by filling the reservoir with DOT 4 brake fluid. Pump the pedal 10-15 times, then hold it down while an assistant opens the slave cylinder bleeder valve. Repeat until fluid flows without air bubbles, ensuring smooth clutch engagement and consistent pedal feel.

Cooling and Ventilation Considerations

Proper cooling is crucial for manual transmissions. Upgrading to an external transmission cooler enhances especially heat dissipation, ensuring optimal performance and longevity of the gearbox.

10.1 Ensuring Proper Transmission Cooling

Proper transmission cooling is vital for longevity and performance. Inspect and clean the existing cooler, and consider upgrading to an external transmission cooler for enhanced heat dissipation. Ensure all coolant lines are secure and free from leaks to maintain consistent fluid flow and optimal operating temperatures during driving.

10.2 Upgrading Cooling Systems for Manual Transmission

Upgrading the cooling system enhances reliability under increased load. Install a high-performance external transmission cooler with durable lines to improve heat dissipation. Additionally, ensure proper airflow around the radiator and consider a transmission temperature gauge for monitoring. These upgrades prevent overheating and extend the lifespan of your manual transmission during spirited driving conditions.

Cost Analysis of the Manual Transmission Swap

The E30 manual transmission swap involves significant costs, including labor, parts, and tools. Professional installation can range from $1,500 to $3,000, depending on complexity and location.

11.1 Labor Costs for Professional Installation

Labor costs for a professional E30 manual transmission swap typically range between $1,500 and $3,000. This includes transmission removal, clutch replacement, and linkage adjustments. Rates vary based on location, mechanic expertise, and workshop fees, with hourly rates averaging $100 to $200. A skilled technician ensures a smooth, efficient installation, making the investment worthwhile for optimal performance and reliability.

11.2 DIY vs. Professional Installation: Cost Comparison

A DIY E30 manual swap can save significant costs, with parts averaging $1,500 to $2,500, depending on transmission and clutch quality. Professional installation typically adds $1,500 to $3,000 in labor, totaling $3,000 to $5,500. DIY requires tools, expertise, and time but offers substantial savings, while professional work ensures reliability and efficiency, making it a worthwhile investment for many enthusiasts.

Common Issues and Troubleshooting

Common issues include reverse light switch wiring problems, clutch alignment, and hydraulic system leaks. Troubleshooting involves checking connections, bleeding the system, and ensuring proper installation of components.

12.1 Troubleshooting Common Swap-Related Problems

Common issues during the E30 manual swap include reverse light switch wiring problems, clutch system leaks, and transmission cooling inefficiencies. Troubleshooting involves inspecting electrical connections, bleeding the hydraulic system, and ensuring proper transmission mounting. Addressing these problems early prevents further mechanical damage and ensures smooth operation of the manual transmission setup.

12.2 Addressing Electrical and Mechanical Issues

Electrical issues often arise from faulty reverse light switch wiring or improper connector installation. Mechanical problems may include misaligned transmission mounts or insufficient clutch system bleeding. Ensure all electrical connections are secure and properly routed. Inspect mechanical components for wear or misalignment, and bleed the clutch system thoroughly to eliminate air bubbles, ensuring smooth operation and preventing further complications.

The E30 manual transmission swap is a rewarding project that enhances performance and driver engagement. While challenging, the outcome offers improved control and a satisfying driving experience.

13.1 Summary of the E30 Manual Transmission Swap

The E30 manual transmission swap is a transformative project that enhances driving engagement and performance. It involves replacing the automatic gearbox with a manual unit, such as the Getrag 260, and requires careful planning, specialized tools, and mechanical expertise. The process includes transmission removal, clutch installation, and wiring adjustments, offering a more connected and satisfying driving experience for enthusiasts.

13.2 Final Tips for a Successful Swap

Plan meticulously, ensuring all parts and tools are ready. Consult BMW communities for insights and troubleshooting. Test the setup thoroughly post-installation to identify and address any issues early. Prioritize precision and patience, as shortcuts can lead to costly repairs. Consider seeking professional help if unsure, especially for complex steps like wiring or clutch alignment. Proper preparation ensures a smooth, enjoyable driving experience.

dupont manual lockdown

On November 8, 2023, DuPont Manual High School faced a harrowing lockdown due to a false active shooter report, prompting a massive police and SWAT response.

Overview of the Incident

On November 8, 2023, at approximately 9:30 a.m., DuPont Manual High School was placed on lockdown due to a reported active shooter threat. The incident began with a false report, triggering a swift response from local law enforcement, including SWAT teams. Students and staff were instructed to shelter in place, with many experiencing heightened fear and anxiety during the prolonged lockdown. The situation was declared safe after an extensive search yielded no evidence of an active aggressor. The event caused significant disruption to the school day and raised concerns about the impact of such incidents on school communities.

Significance of the Event

The DuPont Manual lockdown on November 8, 2023, underscored the vulnerabilities of school safety measures and the psychological impact on students and staff. This incident, caused by a false report, highlighted the challenges of balancing immediate response with verifying threats. It also revealed the need for improved communication systems during crises. The event prompted discussions on swatting incidents and their consequences, emphasizing the importance of preparedness and collaboration between schools and law enforcement. This incident serves as a critical case study for enhancing emergency protocols and addressing the emotional well-being of affected communities.

Background of DuPont Manual High School

DuPont Manual High School is a prestigious magnet school in Louisville, Kentucky, known for its rigorous academic, technical, and artistic programs. Established in 1984, it attracts high-achieving students from across the region, fostering a diverse and interdisciplinary learning environment.

History and Reputation of the School

DuPont Manual High School was established in 1984 as a magnet school, offering a unique interdisciplinary approach to education. Renowned for its rigorous academic, technical, and artistic programs, it has consistently ranked among the top high schools in Kentucky. The school’s diverse student body is drawn from across the region, fostering a vibrant learning community. Its reputation for excellence is bolstered by its specialized magnet programs, which prepare students for college and careers. Over the years, DuPont Manual has earned numerous accolades, including recognition as one of the best public high schools in the nation.

Previous Security Measures and Incidents

DuPont Manual High School had implemented various security measures prior to the 2023 lockdown, including emergency drills and secure entry protocols. While the school had not experienced a major incident before, nearby institutions had faced similar threats, highlighting vulnerabilities in school safety. The district had also conducted regular safety assessments and collaborated with local law enforcement to ensure preparedness. These measures were designed to protect students and staff, though the false active shooter report exposed gaps in handling such situations, prompting a review of existing security strategies to enhance emergency response effectiveness and communication clarity.

Timeline of the Lockdown Event

The lockdown began at 9:30 a.m. on November 8, 2023, after reports of an active shooter. SWAT teams arrived swiftly, securing the school by 10:27 a.m.

Initial Reports and Alerts

The lockdown at DuPont Manual High School began at 9:30 a.m. on November 8, 2023, following a report of an active shooter. The University of Louisville Police Department issued a RAVE Campus Alert, and students received notifications about the situation. The initial alert caused immediate concern, leading to students and staff securing classrooms and hiding in safe areas. Police and ambulances were quickly dispatched to the scene, and the surrounding roads were blocked to ensure the area was secure. The rapid dissemination of the threat through multiple channels highlighted the urgency and gravity of the situation, prompting a swift response from law enforcement.

Police and SWAT Response

Police and SWAT teams responded swiftly to the lockdown at DuPont Manual High School, arriving within minutes of the initial report. Law enforcement secured the perimeter, blocking nearby roads to ensure safety. SWAT officers conducted a thorough search of the building, checking classrooms and corridors for any potential threats. Despite the extensive efforts, no active shooter or evidence of a threat was found. Police communicated updates to students and staff, ensuring their safety throughout the process. The prompt and professional response helped mitigate fear and restored order, allowing the school to return to normal operations after the all-clear was given.

Duration and Conclusion of the Lockdown

The lockdown at DuPont Manual High School lasted approximately one hour, from the initial alert at 9:30 a.m. to the all-clear at 10:27 a.m. During this time, students and staff remained sheltered in secure locations. Police thoroughly investigated the premises, confirming the absence of any threat. Once the area was deemed safe, students were gradually released from their classrooms. The conclusion of the lockdown brought relief to the school community, though the experience left a lasting impact on everyone involved. Authorities then shifted focus to identifying the source of the false report and preventing future disruptions.

Emergency Response and SWAT Operation

The November 8, 2023, lockdown saw a swift police and SWAT response, with officers securing the perimeter and thoroughly searching DuPont Manual High School for threats.

Law Enforcement Actions

Louisville Metro Police Department (LMPD) swiftly responded to the lockdown at DuPont Manual High School, deploying SWAT teams to secure the area and conduct a thorough search.

Communication with Students and Staff

During the lockdown, students and staff at DuPont Manual High School received critical updates through intercom announcements and text alerts. At 9:31 a.m., a RAVE Campus Alert notified students of the active shooter report. The school’s administration, led by Dr. Newman, later announced the lockdown’s end at 10:27 a.m. via intercom, reassuring students that the threat was unfounded. Parents were also informed through text updates, while students inside classrooms relied on whispered communication to stay informed. The initial lack of detailed information caused anxiety, but authorities eventually confirmed the situation was under control, easing fears and allowing for a safe exit.

Impact on the School Community

The lockdown caused significant fear and anxiety among students and staff, disrupting the school day and leaving a lasting emotional impact on the community.

Student and Staff Reactions

Students and staff experienced extreme fear and anxiety during the lockdown, with many clustered in classrooms, away from doors and windows. The uncertainty of the threat heightened stress levels, as they remained silent and hidden. Some described hearing police movements outside, adding to the tension. The prolonged confinement left a lasting emotional impact, with many expressing feelings of vulnerability and distress in the days following the incident.

Emotional and Psychological Effects

The lockdown left a profound emotional toll on students and staff, with many experiencing anxiety, fear, and a heightened sense of vulnerability. The prolonged uncertainty and confinement exacerbated stress levels, creating long-lasting psychological effects. Some students reported difficulty concentrating and recurring fears about school safety. The incident also triggered anxiety attacks and post-traumatic stress symptoms in others. The school community struggled to regain a sense of security, emphasizing the need for mental health support. Counseling services were made available to help students and staff cope with the trauma, highlighting the importance of addressing emotional well-being in the aftermath of such events.

Investigation and Aftermath

The November 8, 2023, lockdown at DuPont Manual High School stemmed from a false active shooter report, prompting an ongoing investigation to identify the source of the threat.

Identifying the Source of the Threat

Authorities prioritized identifying the source of the false active shooter report at DuPont Manual High School. LMPD and JCPS collaborated to trace the origin, reviewing surveillance footage and interviewing witnesses. The investigation aimed to determine if the threat was a swatting incident or a malicious prank. Identifying the source was crucial to prevent future disruptions and ensure accountability. The school community remained anxious as the probe continued, emphasizing the need for swift resolution. Legal consequences for the perpetrator were anticipated, highlighting the seriousness of such threats. The incident underscored the challenges of verifying threats in real-time.

Legal and Administrative Actions

Following the false active shooter report, authorities launched a thorough investigation to identify the perpetrator. Legal actions against the individual responsible were anticipated, potentially including criminal charges for making false threats. The school administration collaborated with law enforcement to ensure accountability and prevent future disruptions. This incident highlighted the importance of addressing such threats to maintain student safety and school operations. The legal consequences served as a deterrent against similar incidents, emphasizing the seriousness of such actions and their impact on the community.

Lessons Learned and Improvements

The lockdown highlighted the need for enhanced communication protocols and emergency training. The school implemented improved security measures to better protect students and staff during future incidents.

Enhanced Security Protocols

Following the lockdown, DuPont Manual High School implemented enhanced security protocols, including regular active shooter drills and improved communication systems. The school also introduced stricter access controls, such as ID checks and visitor screenings, to ensure student safety. Additionally, the administration collaborated with local law enforcement to develop more efficient emergency response plans. These measures aim to prevent future incidents and ensure a safer environment for students and staff. The school also emphasized mental health support to help the community recover from the traumatic event.

Community and Parental Involvement

The lockdown at DuPont Manual High School highlighted the importance of community and parental involvement in school safety. Parents and local residents rallied to support students and staff, offering resources and emotional support. The school organized meetings and forums to address concerns and gather feedback. Collaboration between parents, teachers, and law enforcement strengthened the school’s safety network. This collective effort fostered a sense of unity and shared responsibility, ensuring a safer and more prepared community for future challenges.

The DuPont Manual lockdown underscored the critical need for vigilance and preparedness in school safety. The false active shooter threat caused widespread fear but also led to improved security protocols and strengthened community resilience.

Final Thoughts on the Incident

The DuPont Manual lockdown revealed the devastating impact of false threats on school communities. Students and staff endured intense fear during the prolonged lockdown, while law enforcement’s swift response highlighted preparedness. The incident underscored the importance of mental health support and clear communication. Despite the ordeal, the community demonstrated resilience, uniting to heal and advocate for safer schools. Lessons learned from this event will shape future emergency protocols, ensuring a more secure environment for all.

Future Preparedness and Prevention

The DuPont Manual lockdown underscored the need for enhanced security measures and proactive strategies. Implementing advanced threat detection systems and regular drills can improve response times. Strengthening collaboration between schools and law enforcement ensures seamless communication during crises. Mental health resources for students and staff are crucial to address long-term effects. By adopting these measures, the school community can foster a safer environment and prevent future disruptions. Continuous evaluation of emergency protocols will ensure preparedness for any potential threats, safeguarding the well-being of everyone involved.

quality manual format

A quality manual is the top-level document outlining an organization’s Quality Management System (QMS), detailing policies, procedures, and structure for compliance with ISO standards.

1.1 Overview of Quality Manuals

A quality manual is a foundational document that outlines an organization’s Quality Management System (QMS), detailing its policies, procedures, and structure. It provides a comprehensive overview of how quality is managed across the organization, ensuring alignment with ISO standards such as ISO 9001:2015, ISO 13485:2016, and ISO 17025:2017. The manual serves as a reference for employees, auditors, and stakeholders, specifying roles, responsibilities, and processes to maintain consistency and compliance.

1.2 Importance of a Quality Manual

A quality manual is essential as it serves as the central document for an organization’s Quality Management System (QMS), ensuring compliance with ISO standards. It provides clarity on policies, procedures, and roles, fostering consistency and accountability. By outlining the QMS structure, it helps organizations meet regulatory requirements and customer expectations. The manual also acts as a reference for employees and auditors, facilitating effective communication and continuous improvement, ultimately enhancing operational efficiency and maintaining certification.

1.3 Brief History and Evolution

The concept of quality manuals emerged in the early 20th century as industries adopted quality control practices. The first formal standards appeared with WWII defense requirements. The 1987 publication of ISO 9001 introduced standardized quality manual requirements. Over time, revisions like ISO 9001:2000 emphasized process-oriented approaches, reducing documentation complexity. ISO 9001:2015 introduced risk-based thinking and context-driven manuals. This evolution reflects a shift from rigid, prescriptive formats to flexible, adaptive systems aligned with modern organizational needs and digital transformation.

Key Components of a Quality Manual

A quality manual includes the scope, organizational structure, quality policy, process interactions, and compliance with standards, ensuring alignment with ISO requirements and regulatory expectations.

2.1 Scope of the Quality Management System (QMS)

The scope defines the extent and boundaries of the QMS, specifying the products, services, and processes covered. It aligns with ISO standards, ensuring certification applicability and clarity for stakeholders. The scope statement is concise, outlining organizational activities and geographical locations included in the QMS. This section ensures that the QMS is tailored to the organization’s specific needs while meeting regulatory and customer requirements effectively.

2.2 Organizational Context and Structure

The organizational context describes the company’s background, vision, and operational environment. It outlines the structure, including roles, responsibilities, and hierarchy, ensuring clarity in decision-making processes. This section aligns with ISO standards, providing a framework for understanding how the organization operates and interacts internally and externally. The structure supports the QMS by defining key positions and their contributions to maintaining quality standards and achieving strategic objectives effectively.

2.3 Quality Policy and Objectives

The quality policy outlines the organization’s commitment to quality, aligning with its mission and vision. It is established by leadership and communicated across all levels. Objectives are specific, measurable goals that support the policy, ensuring continuous improvement and customer satisfaction. These objectives are aligned with ISO standards, such as ISO 9001:2015, and are regularly reviewed to reflect organizational priorities and compliance requirements, driving a culture of excellence and accountability throughout the organization.

2.4 Process Approach and Interactions

The process approach in a quality manual emphasizes a systematic and structured method to manage interrelated processes. It defines how key processes interact to achieve organizational objectives, ensuring efficiency and alignment with ISO standards like ISO 9001:2015. This approach outlines responsibilities, sequence of activities, and resource allocation, enabling continuous improvement. By documenting process interactions, organizations ensure clarity and consistency, fostering a cohesive quality management system that meets regulatory and customer expectations effectively. This method is essential for maintaining operational harmony and achieving strategic goals.

ISO Standards and Quality Manual Requirements

ISO standards like ISO 9001:2015, ISO 13485:2016, and ISO 17025:2017 define specific requirements for quality manuals, ensuring compliance and consistency across industries. These standards outline the necessary content, structure, and documentation to meet certification requirements effectively.

3.1 ISO 9001:2015 Requirements

ISO 9001:2015 specifies that a quality manual must outline the scope of the QMS, roles and responsibilities, and documented procedures. It emphasizes a process approach, risk-based thinking, and alignment with organizational context. The manual must reference relevant procedures and records, ensuring compliance with the standard’s requirements. While the 2015 version no longer mandates a quality manual, many organizations still maintain one for clarity and system management.

3.2 ISO 13485:2016 Requirements

ISO 13485:2016 requires the quality manual to outline the scope of the QMS, include a list of standard operating procedures (SOPs), and describe process interactions. It must ensure compliance with regulatory requirements, such as EU MDR and FDA guidelines. The manual should also detail roles, responsibilities, and record-keeping processes. This standard is critical for organizations in the medical device industry, ensuring adherence to stringent quality and safety standards.

3.3 ISO 17025:2017 Requirements

ISO 17025:2017 requires a quality manual that outlines the scope of the Quality Management System (QMS) and includes document control processes. It must detail the laboratory’s structure, policies, and procedures, ensuring compliance with accreditation standards. The manual should cover technical requirements, management system elements, and continuous improvement processes. This standard is specifically designed for laboratories to demonstrate technical competence and compliance with industry regulations, ensuring accurate and reliable test results.

Quality Manual Template and Format

A Quality Manual Template provides a structured format, including sections for scope, organizational context, and quality policy. It ensures clarity with language, graphics, and review processes.

4.1 Standard Structure of a Quality Manual

A Quality Manual typically includes sections like scope, organizational context, quality policy, process interactions, responsibilities, and records. It aligns with ISO standards, ensuring compliance and effectiveness.

4.2 Language, Graphics, and Media Formats

The quality manual should be written in clear, concise language, accessible to all users. Graphics like flowcharts and diagrams can enhance understanding. Media formats may include electronic or printed versions, with consistent styling and version control. Compliance with ISO standards ensures proper documentation and readability. Regular reviews ensure the manual remains relevant and effective for the organization’s QMS.

4.3 Review and Approval Process

The quality manual must undergo a structured review and approval process to ensure accuracy and compliance. Reviews involve stakeholders, including management and quality teams, to verify content alignment with ISO standards. Approvals are documented with signatures and dates. Regular updates are essential to maintain relevance, reflecting organizational changes or new requirements. This process guarantees the manual remains a reliable reference for the QMS, supporting continuous improvement and certification readiness.

Documentation Hierarchy in Quality Management

The quality manual serves as the highest-level document, guiding the structure and implementation of the QMS. It references related procedures, work instructions, and records, ensuring clarity and compliance with standards.

5.1 Levels of QMS Documentation

The QMS documentation hierarchy includes multiple levels, starting with the quality manual as the top-level document. Below it are procedures, work instructions, and records. Procedures detail specific processes, while work instructions provide step-by-step guidance for tasks. Records, the lowest level, document activities and decisions for traceability and compliance. This structured approach ensures clarity, accountability, and alignment with ISO standards, facilitating effective implementation and maintenance of the quality management system across the organization.

5.2 Relationship Between Quality Manual and Procedures

The quality manual outlines the overall QMS framework, while procedures detail specific processes. The manual references procedures but does not duplicate their content. Procedures are level 2 documents, providing step-by-step instructions for tasks outlined in the manual. This hierarchy ensures clarity and avoids redundancy, with the manual serving as the overarching guide and procedures offering practical implementation steps for system operations and compliance with ISO standards.

5.3 Record Keeping and Control

Record keeping and control are critical for maintaining a functional QMS. Records must be accurately maintained, legible, and retrievable. They may be paper-based or electronic, with proper identification, storage, and retrieval processes. Retention periods must be defined, and obsolete records should be appropriately archived or disposed of. This ensures compliance with ISO standards and provides traceability for audits and reviews, supporting overall system effectiveness and accountability. Proper record control safeguards data integrity and accessibility within the QMS framework.

Best Practices for Writing a Quality Manual

Ensure clarity, conciseness, and compliance with ISO standards. Regularly update and maintain the manual to reflect organizational changes and improve effectiveness. Use clear language and concise formatting.

6.1 Clarity and Conciseness

Clarity and conciseness are essential for a quality manual to ensure readability and understanding. Avoid jargon and overly complex sentences. Use straightforward language to convey policies and procedures effectively. Ensure each section is concise, focusing on key points without unnecessary details. This approach enhances accessibility for all staff and stakeholders, promoting compliance and efficient implementation of the QMS. Clear communication is critical for maintaining a robust quality management system.

6.2 Compliance with Standards

Ensuring compliance with relevant ISO standards is critical when developing a quality manual. The manual must align with requirements such as ISO 9001:2015, ISO 13485:2016, or ISO 17025:2017, depending on the organization’s scope. Each standard specifies mandatory elements that must be included, such as the scope of the QMS, organizational structure, and process interactions. Adherence to these standards ensures certification and demonstrates commitment to quality management principles, fostering trust and credibility with customers and regulatory bodies.

6.3 Regular Updates and Maintenance

Regular updates and maintenance of the quality manual are essential to ensure it remains relevant and effective. The manual should be reviewed periodically, ideally annually, to reflect changes in processes, standards, or organizational goals. Updates must follow a documented approval process to maintain integrity. Using document control software can help track versions and ensure all stakeholders have access to the latest information. Regular maintenance also includes training employees on updates to ensure compliance and consistency across the organization.

Tools and Resources for Quality Manual Development

Utilize quality manual templates, document control software, and training resources to streamline development. These tools ensure compliance, consistency, and efficient maintenance of your QMS documentation.

7.1 Quality Manual Templates

Quality manual templates provide a structured framework for developing a compliant QMS. They include pre-designed sections, ensuring alignment with ISO 9001:2015, ISO 13485:2016, and ISO 17025:2017 standards. These templates offer customizable content, allowing organizations to tailor policies, procedures, and process interactions to their specific needs. By using templates, businesses can save time, reduce errors, and maintain consistency. They often include sample procedures, forms, and process maps, making it easier to establish a robust QMS that meets certification requirements.

7.2 Software for Document Control

Document control software streamlines the management of quality manual documents, ensuring version control, approval workflows, and compliance with ISO standards. Tools like ISO 9001:2015-compliant platforms offer features such as automated tracking, secure storage, and access controls. These solutions help maintain the integrity of QMS documentation, enabling organizations to efficiently manage updates and approvals while adhering to regulatory requirements. Effective document control software enhances collaboration and reduces errors in maintaining quality manuals and related records.

7.3 Training and Consultancy

Professional training and consultancy services are essential for developing and implementing a quality manual. Experts provide guidance on ISO standards, ensuring alignment with organizational goals. Training programs cover QMS principles, documentation practices, and compliance requirements. Consultants offer tailored support, from manual drafting to audits, helping organizations achieve certification efficiently. Their expertise ensures that quality manuals are robust, compliant, and adaptable to evolving industry standards, fostering a culture of continuous improvement and operational excellence within the organization.

A well-structured quality manual ensures compliance with ISO standards, streamlines processes, and enhances organizational efficiency, serving as a foundational document for achieving and maintaining certification.

8.1 Summary of Key Points

A quality manual is a foundational document outlining an organization’s Quality Management System (QMS), ensuring compliance with ISO standards like ISO 9001:2015, ISO 13485:2016, and ISO 17025:2017. It includes key sections such as scope, organizational context, quality policy, and process interactions. The manual must be clear, concise, and regularly updated to reflect system changes. Compliance with standards, proper documentation hierarchy, and effective maintenance are critical for a robust QMS, ensuring certification and operational efficiency.

8.2 Final Thoughts on Quality Manual Format

A well-structured quality manual is essential for aligning an organization’s QMS with ISO standards like ISO 9001:2015, ISO 13485:2016, and ISO 17025:2017. It serves as a foundational document, ensuring clarity, compliance, and consistency. Regular updates and adherence to best practices are crucial for maintaining effectiveness. By tailoring the manual to organizational needs and standards, businesses can achieve certification, improve efficiency, and foster a culture of quality and continuous improvement.

brother ls 2125i sewing machine manual

This manual serves as the ultimate guide for understanding and utilizing the Brother LS-2125i sewing machine. Designed for both beginners and experienced users, it covers setup, operation, maintenance, troubleshooting, and advanced techniques to ensure optimal performance and safety.

1.1 Overview of the Brother LS-2125i Sewing Machine

The Brother LS-2125i is a lightweight, portable mechanical sewing machine featuring 10 built-in stitches and 25 stitch functions. It includes an automatic 4-step buttonholer and free-arm capability, ideal for sewing cylindrical items like sleeves. Perfect for basic sewing, mending, crafting, and scrapbooking, this machine is user-friendly and suitable for both beginners and experienced sewers, offering versatility for a variety of projects.

1.2 Importance of the Manual for Optimal Usage

The manual is essential for understanding the Brother LS-2125i’s features, ensuring safe operation, and maximizing its potential. It provides detailed guidance on threading, stitch selection, and troubleshooting, helping users avoid errors and maintain the machine properly. By following the manual, users can optimize performance, extend the machine’s lifespan, and achieve professional-quality results in their sewing projects.

Key Features of the Brother LS-2125i Sewing Machine

The Brother LS-2125i offers 10 built-in stitches, an automatic 4-step buttonholer, free-arm capability, and a reverse sewing lever. Lightweight and portable, it’s perfect for basic sewing tasks.

2.1 Built-in Stitches and Stitch Functions

The Brother LS-2125i features 10 built-in stitches, each with multiple stitch functions, offering versatility for various sewing projects. These include straight stitch, zigzag, and decorative options. The machine also includes an automatic 4-step buttonholer, simplifying the creation of precise buttonholes. With its intuitive design, users can easily select and adjust stitches to suit their needs, making it ideal for both basic sewing and more complex tasks like scrapbooking and crafting.

2.2 Automatic 4-Step Buttonholer and Free-Arm Capability

The Brother LS-2125i features an automatic 4-step buttonholer, simplifying the process of creating precise buttonholes. Additionally, its free-arm design allows for easy sewing of cylindrical items like sleeves and pants legs. These features enhance versatility, making the machine ideal for a wide range of sewing tasks, from basic mending to intricate crafting projects.

How to Use the Brother LS-2125i Sewing Machine

This section provides step-by-step guidance on operating the Brother LS-2125i, including threading, selecting stitches, and performing basic sewing operations. It also covers reverse sewing and fabric handling.

3.1 Threading the Machine and Selecting Stitches

Threading the Brother LS-2125i involves guiding the thread through the machine’s tension discs and taking it to the needle. Always use the correct thread type andbobbin for optimal performance. Select stitches using the dial, choosing from 10 built-in options. The machine also features automatic functions like the 4-step buttonholer. Refer to the manual for detailed diagrams and step-by-step threading guidance to ensure proper setup and operation.

3.2 Basic Sewing Operations and Reverse Sewing

Begin by setting the machine to the desired stitch and adjusting the thread tension. Use the reverse sewing lever to reinforce seams by sewing backward. Guide fabric evenly under the presser foot for consistent stitching. The free-arm design allows easy access for sewing cuffs or sleeves. Always ensure the machine is properly threaded and the correct needle is used for the fabric type. This ensures smooth operation and professional results.

Maintenance and Care of the Brother LS-2125i

Regularly clean the machine to remove dust and debris. Lubricate moving parts as specified to ensure smooth operation. Use only Brother-recommended accessories for optimal performance and longevity.

4.1 Cleaning and Oiling the Machine

Regularly clean the Brother LS-2125i by removing dust and debris with a soft brush. Lightly oil the shuttle hook and moving parts to maintain smooth operation. Use high-quality sewing machine oil to prevent rust and friction. Avoid over-oiling to keep the machine functioning efficiently. Cleaning and lubricating ensure optimal performance and extend the machine’s lifespan. Follow the manual’s guidelines for proper maintenance techniques.

4.2 Troubleshooting Common Issues

Common issues with the Brother LS-2125i include thread bunching, uneven stitching, or bobbin jams. Check thread tension, ensure proper bobbin installation, and clean debris. Needle breakage may occur if using the wrong needle type. Refer to the manual for specific solutions or reset the machine by turning it off and on. Regular maintenance helps prevent these issues and ensures smooth operation.

Accessories and Parts for the Brother LS-2125i

The Brother LS-2125i comes with essential accessories like presser feet, bobbins, and a needle. Additional parts, such as replacement needles and bobbin cases, can be found online or through Brother-authorized dealers.

5.1 Compatible Presser Feet and Bobbins

The Brother LS-2125i supports various presser feet for specialized tasks, such as zigzag, zipper, and buttonhole sewing. Genuine Brother bobbins ensure smooth stitching and are designed to fit perfectly. Always use Brother-recommended presser feet and bobbins to maintain optimal performance and longevity of your machine.

5.2 Where to Find Replacement Parts

Replacement parts for the Brother LS-2125i can be found on the official Brother website, authorized dealers, or online retailers like Amazon. Ensure to purchase genuine Brother parts for compatibility. The manual also provides a detailed parts list, making it easier to identify and order specific components. Always verify authenticity to maintain machine performance and warranty validity.

Advanced Sewing Techniques with the Brother LS-2125i

Explore advanced sewing techniques to maximize your creativity. The Brother LS-2125i supports intricate stitching, buttonhole crafting, and free-arm sewing for cuffs and sleeves, offering versatility for diverse projects.

6.1 Sewing Buttonholes and Cuffs

The Brother LS-2125i simplifies sewing buttonholes with its automatic 4-step buttonholer, ensuring precise and professional results. The free-arm design allows easy sewing of cuffs and sleeves, making it ideal for tailored garments. Use the built-in stitches and follow the manual’s step-by-step instructions to achieve perfect buttonholes and cuffs with ease.

6.2 Using the Free-Arm for Cylindrical Sewing

The Brother LS-2125i’s free-arm design allows for easy sewing of cylindrical items like sleeves and pant legs. Remove the flatbed attachment to access the free-arm, enabling smooth navigation around curved fabrics. This feature is ideal for sewing hard-to-reach areas, ensuring professional results for tailored garments and home decor projects with ease and precision.

Downloading and Understanding the Manual

The Brother LS-2125i manual is available as a downloadable PDF, ensuring easy access to instructions and guidelines. Use Adobe Acrobat Reader to view the document. The manual provides detailed step-by-step guides, symbol explanations, and parts references, serving as a comprehensive resource for mastering the sewing machine’s features and troubleshooting common issues efficiently.

7.1 How to Download the PDF Manual

To download the Brother LS-2125i manual, visit the official Brother website or authorized retailers like Amazon. Search for “Brother LS-2125i manual” and select the PDF link. Ensure Adobe Acrobat Reader is installed for viewing. If unavailable on the main site, check Brother’s support page or retail platforms offering the manual. Follow the download prompts to access the guide, which covers setup, features, and troubleshooting.

7.2 Navigating the Manual and Understanding Symbols

The Brother LS-2125i manual is organized into clear sections, starting with setup and operation. Use the table of contents to quickly locate specific topics. Symbols, such as stitch indicators and safety alerts, are explained in a dedicated section. Familiarize yourself with these symbols to ensure proper machine operation and safety. The manual also includes diagrams and step-by-step guides for easy comprehension.

Safety Precautions and Guidelines

Always ensure safety by turning off the machine during adjustments, using only recommended accessories, and following guidelines to prevent accidents while sewing for optimal safety.

8.1 General Safety Tips for Using the Sewing Machine

  • Always turn off the machine when making adjustments or changing needles to avoid accidents.
  • Use only accessories recommended by Brother to ensure compatibility and safety.
  • Keep loose clothing and long hair tied back while sewing to prevent entanglement.
  • Avoid sewing over pins and use sharp, suitable needles for the fabric type.
  • Never leave the machine unattended while operational, especially near children.
  • Keep the sewing area clean and free from flammable materials.
  • Regularly maintain the machine to prevent malfunctions during use.
  • Follow all guidelines in the manual for safe and efficient sewing.

8.2 Manufacturer Recommendations for Accessories

B Brother recommends using only genuine accessories designed for the LS-2125i to ensure safety and optimal performance. Always use the correct presser feet for specific fabrics, as outlined in the manual. Genuine bobbins and needles are essential for smooth operation. For parts like the bobbin case or shuttle race, refer to the manual or authorized retailers to maintain machine reliability and longevity.

Troubleshooting Common Problems

Common issues include thread bunching, needle breakage, or poor stitch quality. Check bobbin alignment, thread tension, and needle condition. Refer to the manual for detailed solutions.

9.1 Common Errors and Solutions

Common errors include thread bunching, needle breakage, or uneven stitching. Solutions involve checking bobbin alignment, ensuring proper thread tension, and using the correct needle type. If the machine doesn’t power on, verify the power supply and ensure it’s turned on. For thread issues, inspect for tangles or improper threading.Consult the manual for step-by-step fixes and troubleshooting guides to resolve these issues effectively.

9.2 Resetting the Machine and Basic Fixes

To reset the Brother LS-2125i, turn it off, unplug it, and let it rest for 30 minutes. Plug it back in and test basic functions. For basic fixes, ensure the machine is properly threaded and the bobbin is correctly placed. Check for loose screws or tangled threads. Power cycling often resolves minor issues, and cleaning the machine regularly prevents dust buildup. Always refer to the manual for specific reset procedures and troubleshooting steps.

The Brother LS-2125i manual guides users through key features, maintenance, and troubleshooting. For further assistance, visit Brother’s official support for FAQs, manuals, and contact options.

10.1 Summary of Key Takeaways

The Brother LS-2125i manual covers key features, including 10 built-in stitches, automatic buttonholer, and free-arm capability. It guides users through threading, stitch selection, and basic sewing operations. Emphasizing maintenance and troubleshooting, the manual ensures longevity and optimal performance. For further support, Brother provides official resources, FAQs, and contact options to address user inquiries and technical issues effectively.

10.2 Contacting Brother Support for Further Assistance

For additional support, visit Brother’s official website to access downloadable manuals, FAQs, and detailed resources. Brother provides comprehensive technical support through their website, including contact options for troubleshooting and maintenance inquiries, ensuring optimal use of the Brother LS-2125i sewing machine.

oxford house manual

The Oxford House Manual is a blueprint for group living, providing guidelines and principles for self-supported recovery. It emphasizes financial independence and immediate expulsion for substance use, available in Spanish with translations forthcoming.

1.1 Overview of the Oxford House System

The Oxford House System is a network of self-run, self-supported recovery houses for individuals overcoming alcoholism and drug addiction. Each house operates autonomously, following the Oxford House Manual’s guidelines. The system emphasizes financial independence, immediate expulsion for substance use, and democratic decision-making. Since 1975, it has grown globally, providing a structured, supportive environment for thousands in recovery.

1.2 Purpose and Importance of the Manual

The Oxford House Manual serves as a blueprint for structured, self-supported recovery, ensuring accountability and unity among members. Available in Spanish with translations in progress, it outlines essential guidelines for sober living. As the 10th edition since 1975, it remains the foundation for Oxford Houses, empowering thousands to achieve long-term recovery through its proven principles and practices.

Structure of the Oxford House Manual

The manual is organized into chapters covering operational guidelines, financial management, and resident expectations. The 2023 edition updates reflect evolving recovery needs, ensuring clarity and effectiveness.

2.1 Key Sections and Chapters

The Oxford House Manual is a comprehensive guide with key sections covering operational guidelines, financial management, and resident responsibilities. The 2023 edition includes updated policies and best practices for sober living. Chapters detail procedures for starting new houses, democratic decision-making, and accountability. Translations into Spanish and other languages ensure accessibility for diverse populations. It is a vital resource for recovery communities worldwide.

2.2 Updates and Editions (e.g., 2023 Version)

The Oxford House Manual has undergone several updates, with the 2023 version being the most recent. This edition includes revised policies and expanded guidelines for sober living. Previous editions, such as the 8th and 9th, laid the groundwork for the current version. Updates reflect evolving recovery needs and incorporate feedback from residents and alumni. Translations into Spanish and other languages are also available.

Core Principles of the Oxford House Manual

The manual emphasizes financial self-support, immediate expulsion for substance use, democratic decision-making, and mutual respect among members, fostering a structured environment for recovery and personal growth.

3.1 Financial Self-Support

Financial self-support is a cornerstone of the Oxford House system. Each house is fully self-sufficient, with members contributing equally to cover rent, utilities, and expenses. This model ensures independence, teaches responsibility, and fosters a sense of community. No external funding is required, allowing houses to operate autonomously and sustainably, empowering residents in their recovery journey.

3.2 Immediate Expulsion for Substance Use

The Oxford House Manual mandates immediate expulsion for any member who returns to substance use. This strict, non-negotiable rule ensures a safe and sober environment for all residents. Relapse jeopardizes the entire community, making swift action necessary to protect the group’s commitment to recovery. This policy is uniformly enforced across all Oxford Houses.

3.3 Democratic Decision-Making Process

The Oxford House Manual emphasizes a democratic approach, where decisions are made by majority vote. This ensures all members have a voice in governing their house, fostering responsibility and accountability. Financial decisions, house rules, and expulsions are determined collectively, promoting unity and fairness. This process strengthens the sense of community and shared commitment to recovery.

3.4 Respect and Responsibility Among Members

The Oxford House Manual underscores the importance of mutual respect and shared responsibility. Members are expected to respect one another’s space, privacy, and recovery journey. Each individual contributes to household tasks, fostering a sense of unity and accountability. This environment promotes personal growth, accountability, and a strong foundation for long-term sobriety. Respect is key to maintaining harmony within the house.

Governance and Operations

Governed by Oxford House, Inc., a nonprofit overseeing operations, ensuring adherence to the manual. Each house operates autonomously, united under shared principles and financial self-support.

4.1 Role of the Oxford House Chapter Manual

The Oxford House Chapter Manual provides guidelines for houses to function as a unified group, ensuring adherence to core principles. It outlines procedures for starting new houses, financial management, and member conduct, fostering consistency across all Oxford Houses. This manual is essential for maintaining the integrity and operational standards of the Oxford House system.

4.2 Procedures for Starting a New Oxford House

Starting a new Oxford House involves assessing local recovery needs, securing a suitable property, and ensuring financial stability. The process includes renting a house, gathering committed members, and registering with Oxford House, Inc. The Chapter Manual guides these steps, ensuring alignment with the program’s principles and operational standards for a successful, self-supported recovery environment.

Resident Responsibilities and Expectations

Residents are expected to adhere to sober living guidelines, contribute to household responsibilities, and maintain mutual respect. Accountability and commitment to recovery are essential, fostering a supportive environment for all members.

5.1 Adherence to Sober Living Guidelines

Residents must strictly adhere to sober living guidelines, avoiding alcohol and drugs entirely. Immediate expulsion follows any substance use, ensuring a safe environment. Members are expected to uphold these rules to maintain trust and accountability within the house, fostering a supportive and structured space for recovery and personal growth.

5.2 Contribution to Household Responsibilities

Members are required to contribute to household responsibilities, ensuring the smooth operation of the residence. This includes tasks like cleaning, cooking, and paying rent on time. Active participation fosters a sense of community and accountability, maintaining a respectful and stable living environment essential for recovery. Each member’s involvement is crucial to upholding the house’s well-being.

The Role of Oxford House, Inc. (OHI)

Oxford House, Inc. (OHI) is a nonprofit organization serving as the umbrella for Oxford Houses worldwide. It provides support, resources, and governance to ensure houses operate effectively.

6.1 Overview of OHI as an Umbrella Organization

Oxford House, Inc. (OHI) is a nonprofit organization serving as the umbrella entity for all Oxford Houses worldwide. It provides oversight, resources, and support to ensure houses adhere to the manual’s guidelines, fostering a unified and effective recovery environment. OHI’s primary goal is to facilitate housing and rehabilitative support for individuals recovering from addiction.

6.2 Support and Resources Provided by OHI

OHI provides essential resources, including the Oxford House Manual, training materials, and guidance for establishing and maintaining houses. It offers support for starting new houses and ensures compliance with the manual’s principles. OHI also hosts the annual Oxford House World Convention, fostering a sense of community and sharing best practices among members. These resources empower houses to thrive.

Expansion and Growth of Oxford Houses

Oxford Houses have grown significantly, with over 580,000 individuals served, demonstrating their global expansion and positive impact on recovery communities worldwide. This growth reflects their effectiveness.

7.1 Increasing Number of Oxford Houses Worldwide

The global expansion of Oxford Houses has been remarkable, with over 580,000 individuals served, showcasing their growing presence and impact. Each house operates autonomously, fostering a supportive environment for recovery. This growth underscores the effectiveness of the Oxford House model in addressing addiction recovery needs worldwide.

7.2 Impact on Recovery Communities

Oxford Houses have revolutionized recovery communities by offering a supportive, self-run environment that fosters long-term sobriety. Their emphasis on peer accountability and shared responsibility has empowered countless individuals to rebuild their lives. This model has become a cornerstone in addiction recovery, demonstrating the power of community-driven solutions to combat substance abuse and promote lasting change.

Translations and Accessibility

The Oxford House Manual is now available in Spanish, with translations into other languages in preparation. This ensures accessibility for diverse populations, promoting inclusivity in recovery efforts.

8.1 Availability in Spanish and Other Languages

The Oxford House Manual is now available in Spanish, with translations into other languages currently in progress. This expansion ensures that the manual’s guidelines and principles reach a more diverse population, fostering inclusivity and accessibility for individuals in recovery worldwide. The availability of multilingual resources supports the global growth of Oxford Houses, aiding individuals from various linguistic backgrounds in their recovery journey.

8.2 Efforts to Reach Diverse Populations

The Oxford House Manual’s translation into Spanish and other languages reflects efforts to reach diverse populations. Cultural adaptations ensure accessibility for various groups, breaking language barriers and enhancing recovery support. Oxford House, Inc. actively supports these initiatives, fostering inclusivity and aiding global recovery efforts by providing equitable resources to all members.

The Oxford House World Convention

The Oxford House World Convention is an annual event celebrating recovery milestones and success stories, uniting members and alumni to honor the Oxford House model’s impact.

9.1 Annual Events and Themes

The Oxford House World Convention hosts annual events with themes that inspire and motivate recovery journeys. Each year’s theme addresses current challenges and successes, fostering a sense of community. Workshops, testimonials, and shared experiences highlight the impact of Oxford Houses worldwide, reinforcing the model’s effectiveness and sustainability. These gatherings strengthen bonds among members and alumni.

9.2 Celebrating Success Stories and Milestones

The Oxford House World Convention highlights personal and collective achievements, showcasing transformative recovery journeys. Members share testimonials, honoring milestones like years of sobriety and house anniversaries. These celebrations foster inspiration, unity, and pride, reinforcing the effectiveness of the Oxford House model and its life-changing impact on individuals and communities worldwide. Success stories strengthen motivation and resilience.

Reviews and Testimonials

The Oxford House Manual receives heartfelt testimonials from residents and alumni, highlighting its life-changing impact and earning widespread community recognition and appreciation.

10.1 Feedback from Residents and Alumni

Residents and alumni often describe the Oxford House Manual as life-changing, providing structure and accountability essential for recovery; Many credit it with fostering a sense of community, responsibility, and empowerment. Testimonials highlight how the manual’s clear guidelines and principles helped them build a solid foundation for long-term sobriety and personal growth.

10.2 Community Recognition and Appreciation

The Oxford House Manual is widely recognized for its role in fostering recovery communities. Local communities and organizations often express gratitude for its structured approach, which promotes accountability and sobriety. Many acknowledge its impact in transforming lives, with the growing number of Oxford Houses reflecting its expanding reach and support for those in recovery.

The Future of the Oxford House Manual

The manual will continue to evolve, with planned updates and translations into more languages. It will adapt to changing recovery needs, ensuring its relevance and accessibility for future generations.

11.1 Planned Updates and Revisions

The Oxford House Manual will undergo periodic revisions to reflect evolving recovery needs. Future editions will incorporate feedback from members and alumni, ensuring relevance and adaptability. Updates will focus on expanding accessibility, including translations into additional languages, while maintaining core principles. The 2023 version already demonstrates this commitment, with plans for further enhancements to support diverse populations and modern recovery challenges.

11.2 Adapting to Changing Recovery Needs

The Oxford House Manual evolves to address modern recovery challenges, ensuring its relevance and effectiveness. Updates incorporate feedback from members and alumni, focusing on inclusivity and accessibility. While core principles remain unchanged, the manual adapts to meet diverse needs, reflecting the dynamic nature of recovery and supporting long-term sobriety for all members.

The Oxford House Manual is a vital guide for self-supported recovery, providing structure and accountability for individuals seeking long-term sobriety and personal growth.

12.1 Summary of the Manual’s Significance

The Oxford House Manual is a cornerstone for recovery, providing a structured, self-supported environment for individuals to achieve sobriety. Its principles of financial independence, accountability, and mutual respect have empowered thousands since 1975. Available in multiple languages, it ensures accessibility and inclusivity, making it a vital resource for global recovery communities.

12.2 Final Thoughts on Its Role in Recovery

The Oxford House Manual serves as a timeless blueprint for recovery, fostering independence and accountability. Its principles empower individuals to rebuild their lives, creating a supportive community. By adapting to evolving needs, it remains a cornerstone for sustainable sobriety, offering hope and structure to those seeking lasting recovery.

nikon coolpix l830 user manual

The Nikon Coolpix L830 is a versatile digital camera featuring a 34x optical zoom and 16.0 megapixels‚ ideal for capturing stunning landscapes and wildlife. Its user manual provides essential guidance for optimal use and explores advanced features like Fireworks Mode and Best Shot Selector‚ ensuring unforgettable photography experiences.

Overview of the Camera

The Nikon Coolpix L830 is a compact digital camera designed for ease of use and high-quality photography. It features a 34x optical zoom‚ a 22.5mm ultra-wide lens‚ and a 16.0-megapixel CMOS sensor‚ making it ideal for capturing detailed shots of distant subjects and sweeping landscapes. The camera is user-friendly‚ catering to both beginners and casual photographers. Its compact design ensures portability while delivering impressive image results. The manual emphasizes safety precautions and provides a comprehensive guide to unlocking the camera’s full potential. By familiarizing yourself with the manual‚ you can optimize your photography experience and explore advanced features like Fireworks Mode and Best Shot Selector. This camera is a versatile tool for capturing life’s memorable moments with clarity and precision.

Importance of the User Manual

The user manual for the Nikon Coolpix L830 is a crucial resource for understanding and utilizing the camera’s features effectively. It provides detailed instructions on safety precautions‚ camera setup‚ and operational guidelines‚ ensuring safe and optimal use. The manual covers essential information‚ from basic camera operations to advanced shooting modes‚ helping users of all skill levels to enhance their photography skills. By reading the manual‚ users can avoid potential damage to the camera and make the most of its capabilities. It serves as a comprehensive guide‚ enabling users to explore and master the camera’s functionalities‚ thereby improving their overall photography experience and capturing high-quality images consistently.

Key Features of the Nikon Coolpix L830

The Nikon Coolpix L830 boasts a 34x optical zoom‚ 16.0 megapixels‚ and a CMOS sensor for crisp images. It features an ultra-wide 22.5mm lens‚ ideal for landscapes and distant subjects‚ and includes modes like Best Shot Selector and Fireworks Mode for enhanced photography experiences.

34x Optical Zoom and 22.5mm Ultra-Wide Lens

The Nikon Coolpix L830 is equipped with an impressive 34x optical zoom‚ allowing users to capture distant subjects with remarkable clarity. The 22.5mm ultra-wide lens is perfect for sweeping landscapes‚ group shots‚ and interior photography. This combination ensures versatility‚ whether shooting wildlife‚ sports‚ or wide-angle scenes. The lens’s wide aperture enhances low-light performance‚ and the optical zoom maintains image quality without digital degradation. This feature-rich design makes the L830 ideal for photographers seeking flexibility and high-quality results in various shooting conditions.

16.0 Megapixels and CMOS Sensor

The Nikon Coolpix L830 features a high-resolution 16.0-megapixel CMOS sensor‚ delivering crisp and vibrant images with excellent detail. The CMOS sensor is designed to capture accurate colors and subtle tones‚ even in challenging lighting conditions. Its backside illumination technology enhances low-light performance‚ reducing noise and ensuring clear photos in dimly lit environments. With this sensor‚ users can expect sharp portraits‚ vivid landscapes‚ and precise textures. The combination of the CMOS sensor with the 34x optical zoom and 22.5mm ultra-wide lens creates a powerful imaging system‚ making the L830 ideal for capturing a wide range of subjects with exceptional quality.

Additional Features (e.g.‚ Best Shot Selector‚ Fireworks Mode)

The Nikon Coolpix L830 offers a variety of advanced features to enhance your photography experience. The Best Shot Selector (BSS) automatically captures up to 10 frames and selects the sharpest image‚ reducing blur caused by camera shake or subject movement. Fireworks Mode is optimized for capturing vibrant and dynamic fireworks displays‚ with a fixed shutter speed to ensure crisp‚ well-exposed results. These features‚ along with others like Scene Auto Selector and Smart Portrait System‚ provide users with tools to achieve professional-quality images effortlessly. The camera’s intuitive design and robust feature set make it ideal for photographers of all skill levels‚ ensuring every moment is captured with precision and clarity.

Understanding the User Manual

The Nikon Coolpix L830 user manual is a comprehensive guide covering setup‚ operation‚ and troubleshooting. It is designed to be user-friendly‚ helping photographers of all levels maximize their camera’s potential and enhance their photography experience.

Structure and Content of the Manual

The Nikon Coolpix L830 user manual is structured to guide users through every aspect of the camera’s operation. It begins with a “Read This First” section‚ emphasizing safety precautions and initial setup. The manual is divided into clear sections‚ including basic camera operations‚ shooting modes‚ and advanced features like Fireworks Mode and Best Shot Selector. Visual aids and diagrams are included to help users understand complex functions.

Troubleshooting tips and error messages are also covered‚ ensuring users can resolve common issues independently. The manual concludes with information on firmware updates and customer support options. Its comprehensive yet user-friendly layout makes it an invaluable resource for photographers of all skill levels.

Safety Information and Precautions

The Nikon Coolpix L830 user manual includes a dedicated section on safety information and precautions to ensure safe and proper use of the camera. This section‚ found in “For Your Safety” (pages viii-xi)‚ highlights essential guidelines to prevent damage to the camera and potential harm to users. Key precautions include avoiding extreme temperatures‚ improper handling‚ and misuse of the battery. Users are also advised to follow proper charging procedures and avoid exposing the camera to water or moisture. Additionally‚ the manual emphasizes adhering to local regulations and manufacturer recommendations to ensure optimal performance and longevity of the device. These precautions are crucial for maintaining both user safety and the camera’s functionality.

How to Use the Nikon Coolpix L830

The Nikon Coolpix L830 is designed for ease of use‚ offering intuitive controls and a user-friendly interface. Start by familiarizing yourself with the camera’s basic operations‚ such as turning it on‚ adjusting settings‚ and navigating through the menu system. Understanding these fundamental steps will enhance your photography experience and help you make the most of your camera’s capabilities.

Basic Camera Operations

Mastering the Nikon Coolpix L830 begins with understanding its basic operations. Start by turning the camera on using the power button located on the top. Next‚ use the mode dial to select your preferred shooting mode‚ such as Auto‚ Scene‚ or Manual. Zoom in or out using the zoom control‚ ensuring your subject is framed perfectly. To capture an image‚ press the shutter-release button halfway to focus and fully to take the photo. Review your shots on the LCD screen and delete unwanted images using the delete button. Familiarize yourself with the menu system to adjust settings like ISO‚ white balance‚ and flash. These fundamental steps will help you navigate the camera effortlessly and prepare you for more advanced features.

Shooting Modes and Settings

The Nikon Coolpix L830 offers a variety of shooting modes to suit different photography needs. Auto Mode simplifies capture by automatically adjusting settings‚ while Scene Modes like Portrait‚ Landscape‚ and Night Portrait optimize results for specific scenarios; For creative control‚ Manual Mode allows adjustment of ISO‚ white balance‚ and exposure compensation. The camera also features additional settings such as Best Shot Selector‚ which captures multiple shots and selects the sharpest image‚ and Fireworks Mode for stunning nighttime displays. These modes and settings empower users to tailor their photography experience‚ ensuring they capture high-quality images in various conditions. Experimenting with these options will enhance your understanding of the camera’s capabilities and improve your overall photography skills;

Troubleshooting Common Issues

The Nikon Coolpix L830 user manual addresses common problems like the flash not firing or the screen not lighting up. Consult the manual for solutions to these issues.

Flash Not Firing and Other Common Problems

The Nikon Coolpix L830 user manual addresses issues like the flash not firing‚ which can occur due to settings or battery drain. Ensure the flash is enabled‚ and the camera is not in “Flash Off” mode. If the issue persists‚ check the battery level or try resetting the camera. Additionally‚ users may encounter problems like the screen not lighting up‚ which can be resolved by charging the battery or cleaning the lens. The manual provides step-by-step solutions for such common issues‚ ensuring seamless camera operation. Refer to the troubleshooting section for detailed guidance on resolving these and other potential problems effectively.

Additional Resources and Support

The Nikon Coolpix L830 manual and firmware updates are available for download online. Online communities and customer support provide further assistance for troubleshooting and optimizing camera use.

Downloading the Manual and Firmware Updates

The Nikon Coolpix L830 user manual and firmware updates can be downloaded directly from Nikon’s official website or trusted sources. The manual is available in English and has been rated highly for clarity and detail. It covers everything from basic operations to advanced features like Fireworks Mode. Firmware updates ensure optimal camera performance and may add new features or improve existing ones. To download‚ visit Nikon’s support page‚ select your camera model‚ and follow the provided instructions. Always use official links to avoid unauthorized software. After downloading‚ refer to the manual for installation guidance. This ensures your camera stays up-to-date and functions at its best.

Online Communities and Customer Support

Nikon offers extensive online resources and customer support for the Coolpix L830. Users can access the official Nikon support website for troubleshooting‚ firmware updates‚ and detailed guides. Additionally‚ online forums and photography communities provide valuable insights and tips from experienced users. Social media groups dedicated to Nikon cameras are also great for sharing experiences and resolving issues. For direct assistance‚ Nikon’s customer support team is available via phone‚ email‚ or live chat. These resources ensure that users can maximize their camera’s potential and address any concerns promptly. Engaging with these platforms fosters a supportive community and enhances the overall photography experience.

The Nikon Coolpix L830 is a powerful and user-friendly camera designed to deliver high-quality images with its 34x optical zoom and 16.0-megapixel CMOS sensor. The user manual plays a crucial role in unlocking its full potential‚ providing clear guidance on advanced features like Fireworks Mode and Best Shot Selector. By familiarizing yourself with the manual‚ you can optimize settings for various shooting conditions and troubleshoot common issues. Nikon’s customer support and online communities further enhance your experience‚ offering troubleshooting tips and firmware updates. Whether you’re a casual shooter or an aspiring photographer‚ the Coolpix L830‚ combined with its comprehensive manual‚ ensures unforgettable photography experiences. Keep exploring and capturing life’s moments with confidence!