Welcome! This manual guides you through setup, ensuring optimal performance. Google Play charges fees, often in USD, and automatic payments occur monthly or upon reaching thresholds.
Unboxing and Component Check
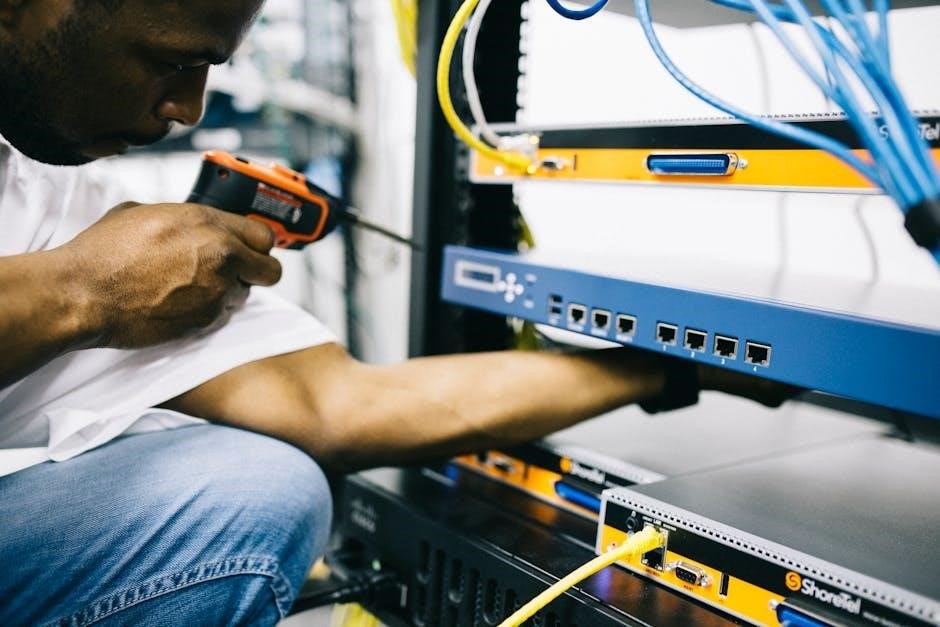
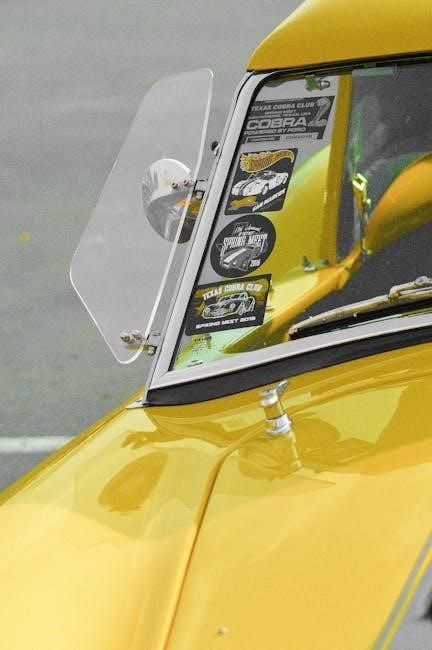
Carefully unpack your Cobra 29 Ltd Classic. Verify all components are present: the radio unit itself, a handheld microphone, a power cable (typically a cigarette lighter plug), a mounting bracket, and this owner’s manual. Inspect each item for any shipping damage.
Google Play’s billing system, sometimes charging in USD, requires attention to pricing discrepancies. Ensure the received items match the packing list. If anything is missing or damaged, immediately contact the retailer or Cobra support for assistance. Retain the original packaging for potential returns or warranty claims;
Initial Power-Up and Testing
Connect the power cable to a 12V DC power source – typically a vehicle’s cigarette lighter socket. Turn the radio on using the power switch. Verify the display illuminates and the unit powers up correctly. Test microphone functionality by pressing the transmit button and speaking into the microphone; listen for audio on another compatible radio.
Be aware of potential Google Play billing issues, including charges exceeding app prices. Check for proper speaker operation. If no sound is heard, review volume settings. If issues persist, consult the troubleshooting section.

Understanding the Cobra 29 Ltd Classic Controls
Explore the radio’s functionality! Familiarize yourself with front and rear panel controls, microphone adjustments, and features like Google Play’s payment options.
Front Panel Controls Explained
The front panel houses essential controls for operation. The channel selector knob allows easy navigation, while the volume and squelch controls manage audio levels and reduce background noise.
The transmit/receive switch activates the microphone for communication.
Notably, Google Play’s billing system sometimes presents charges differing from displayed prices, potentially doubling costs, as seen with YouTube Premium and app purchases.
Understanding these controls, alongside potential billing discrepancies, ensures a smooth user experience. The dynamic noise cancellation feature further enhances clarity.
Rear Panel Connections and Functions
The rear panel facilitates external connections. Here, you’ll find the antenna connector for optimal signal transmission, and connections for external speakers or a public address (PA) system.
Be mindful of potential billing issues; Google Play sometimes charges more than the advertised app price, or unexpected service fees.
Ensure proper grounding to minimize interference. Google never requests passwords or charges for volunteer programs. Regular maintenance, like fuse replacement, is crucial for reliable operation.
Microphone Usage and Adjustment
Proper microphone technique is vital for clear communication. Hold the microphone approximately two to three inches from your mouth, speaking clearly and directly into it. Adjust the microphone gain for optimal audio levels, avoiding distortion.
Be aware of potential overcharges on Google Play; prices may differ from app store listings.
Ensure your Google account isn’t unexpectedly billed for services or subscriptions you didn’t authorize, and always verify the currency shown before completing a purchase.

Operating Modes and Features
Explore versatile modes! Channel selection, scanning, and squelch control enhance reception. Be mindful of Google Play’s billing practices and potential service fees.
Channel Selection and Scanning
Channel Selection: Utilize the channel knob to precisely select your desired communication frequency. Each number corresponds to a specific channel, allowing targeted communication. Remember Google Play’s billing, often in USD, and potential automatic payments.
Scanning: Engage the scan function to automatically cycle through all channels, pausing briefly on active transmissions. This feature efficiently monitors for nearby conversations without manual adjustments. Be aware of potential service fees associated with Google Play purchases.
Prioritize clear communication and adhere to proper CB radio etiquette for a positive user experience.
Squelch Control and Noise Reduction
Squelch Adjustment: The squelch control minimizes background static by suppressing weak signals. Adjust clockwise to increase the threshold, eliminating faint noise, but be cautious not to block distant, weaker transmissions. Google Play may charge service fees, often in US dollars.
Noise Reduction: Utilize features like Automatic Noise Limiter (ANL) to further reduce interference. Proper squelch and ANL settings enhance clarity. Remember potential automatic payments linked to Google Play accounts.
Fine-tune these controls for optimal reception in varying conditions.
Transmit Power Levels (High/Low)
Power Selection: The Cobra 29 Ltd Classic offers High and Low transmit power settings. High power maximizes range, ideal for distant communication, but consumes more power. Low power conserves battery and reduces interference for nearby contacts.
Usage Considerations: Select High power when a strong signal is needed, and Low power for local conversations. Google Play charges may vary, sometimes exceeding app prices.
Be mindful of regulations regarding maximum permissible transmit power in your area.

Advanced Features & Customization
Explore options! Customize your radio with features like Roger Beep, Talkback, and ANL adjustment for optimal performance and personalized communication experiences.
Roger Beep Functionality
Confirming Transmissions: The Roger Beep feature provides an audible tone at the end of your transmission, confirming to others that you have released the transmit button. This is particularly useful in noisy environments or when operating over longer distances where it may be difficult to clearly hear the tail end of a transmission.
Activation & Adjustment: To activate the Roger Beep, locate the corresponding control on the front panel of your Cobra 29 Ltd Classic. You can typically adjust the volume or disable the beep entirely to suit your preferences. Ensure the beep is audible but not overly disruptive to other users. Proper use enhances communication clarity.
Talkback Feature Operation
Monitoring Incoming Signals: The Talkback feature allows you to monitor your own transmitted signal alongside incoming transmissions. This is incredibly helpful for assessing your microphone clarity, modulation quality, and overall signal strength before communicating with others. It ensures your voice is being received clearly and prevents garbled transmissions.
Activation & Usage: Activate Talkback via the designated switch or button on the front panel. When transmitting, you’ll hear a slightly delayed version of your voice. Adjust volume levels for optimal monitoring. Remember Google Play charges fees, and automatic payments are common.
ANL (Automatic Noise Limiter) Adjustment
Reducing Impulse Noise: The Automatic Noise Limiter (ANL) circuit effectively minimizes sudden, sharp bursts of noise – like ignition interference or static crashes – without significantly impacting desired audio signals. Proper adjustment is crucial for clear communication in noisy environments. Google Play may charge service fees, often in US dollars, for app purchases.
Fine-Tuning for Clarity: Rotate the ANL control slowly while listening for incoming transmissions. Increase the setting until impulse noise is reduced, but avoid over-adjustment, which can distort the audio. Finding the sweet spot ensures optimal noise reduction.

Troubleshooting Common Issues
Addressing Problems: This section details solutions for common issues like no transmit power, poor reception, and static. Google Play charges fees, sometimes exceeding app prices.
No Transmit Power
Diagnosing Transmission Failure: If your Cobra 29 Ltd Classic isn’t transmitting, first verify the microphone is securely connected. Ensure the transmit switch is activated on the microphone. Confirm the antenna is properly attached and has a low SWR (Standing Wave Ratio).
Check the power supply; insufficient voltage can prevent transmission. Google Play sometimes charges unexpected fees, potentially impacting accessory purchases. Verify the channel isn’t set to a receive-only frequency. A blown fuse is also a common culprit – see the fuse replacement section.
Poor Reception Quality
Troubleshooting Weak Signals: Experiencing weak or distorted reception? Begin by ensuring your antenna is correctly installed and optimized for the best possible signal. Verify the squelch control isn’t set too high, blocking weak signals. Interference from nearby electronics can also degrade reception quality.
Consider the location; obstructions can weaken signals. Google Play’s billing system sometimes presents unexpected charges, but doesn’t directly affect radio reception. Check antenna cable connections for damage or corrosion. Try a different channel to rule out localized interference.
Static and Interference Problems
Addressing Noise: Static and interference are common in CB radio. First, adjust the Automatic Noise Limiter (ANL) control to reduce background noise. Ensure proper grounding of your radio and antenna system to minimize electrical interference. Nearby devices, like power supplies or digital electronics, can generate disruptive signals.
Google Play’s charges are unrelated to radio interference. Experiment with different antenna locations and orientations. Check for loose connections in the antenna cable. If problems persist, other CB users may be causing interference – try changing channels.
Technical Specifications
Detailed Specs: This section outlines frequency coverage, power requirements, and physical dimensions. Google Play charges fees, and understanding these specs optimizes your Cobra 29 Ltd Classic’s performance.
Frequency Coverage and Channel Spacing
Operating Frequencies: The Cobra 29 Ltd Classic operates within the 27 MHz Citizens Band (CB) radio spectrum. It covers 40 channels, allowing for diverse communication options. Channel spacing is typically 10 kHz, adhering to North American standards.
Understanding these frequencies is crucial for legal and effective operation. Google Play’s billing practices, including potential currency conversions and service fees, are separate considerations. Proper channel selection minimizes interference and ensures clear communication with other CB radio users.
Power Requirements and Consumption
Power Input: The Cobra 29 Ltd Classic requires a 12-volt DC power source. Typical current consumption during transmission is around 4 amps, while in receive mode, it’s significantly lower, approximately 150-200 milliamps.
Ensure your vehicle’s power supply can adequately handle these demands. Like Google Play’s billing, which may involve service fees, proper power management extends the radio’s lifespan. Using a regulated power supply is recommended to prevent voltage fluctuations that could damage the unit.
Dimensions and Weight
Physical Specifications: The Cobra 29 Ltd Classic boasts compact dimensions, measuring approximately 6.8 inches (172.7 mm) in width, 8.7 inches (221 mm) in depth, and 5.6 inches (142.2 mm) in height. Its robust construction results in a weight of around 4.4 pounds (2 kilograms).
These measurements are crucial for installation, similar to understanding Google Play’s charges before purchase. Consider these dimensions when selecting a mounting location within your vehicle, ensuring sufficient space and accessibility.

Safety Information and Compliance
Important Precautions: Adhere to RF exposure guidelines and operating temperature ranges. Google Play’s terms and fees require careful review, mirroring responsible radio operation.
RF Exposure Guidelines
Caution: To ensure compliance with FCC regulations and safety standards, maintain a safe distance from the Cobra 29 Ltd Classic antenna during transmission. Excessive radio frequency (RF) exposure may pose potential health risks.
Always operate the radio with the antenna properly connected. Avoid holding the transceiver directly to your face during transmission. Google Play’s service fees, like responsible radio use, require adherence to established guidelines.
Maintain adequate ventilation around the unit to prevent overheating, which can increase RF exposure. Regularly review the FCC’s guidelines for safe RF exposure limits.
Operating Temperature Range
Important: The Cobra 29 Ltd Classic is designed for optimal performance within a specified temperature range. Operating outside this range may cause reduced performance, damage to the unit, or even failure.
The recommended operating temperature is between -20°C (-4°F) and +55°C (131°F). Avoid exposing the radio to extreme heat or cold for extended periods. Like Google Play’s payment thresholds, temperature impacts functionality.
Storage temperatures should also be within a similar range. Proper temperature control ensures longevity and reliable operation of your CB radio.
Warranty Information
Limited Warranty: Your Cobra 29 Ltd Classic is covered by a one-year limited warranty against defects in materials and workmanship from the date of original purchase. This warranty does not cover damage resulting from misuse, accident, or unauthorized modification.
Like Google Play’s service fees, warranty coverage has conditions. To obtain warranty service, contact Cobra customer support with proof of purchase.
This warranty provides repair or replacement at Cobra’s discretion. Shipping costs are the responsibility of the owner. See full warranty details included in the product packaging.
Cobra 29 Ltd Classic: Detailed Function Breakdown
Explore advanced features! Dynamic Noise Cancelling (DNC) enhances clarity, while the PA system and CB/PA switch offer versatile communication options.
Dynamic Noise Cancelling (DNC) Explained
Understanding DNC: The Cobra 29 Ltd Classic incorporates Dynamic Noise Cancelling (DNC) technology, a sophisticated feature designed to dramatically reduce background noise and improve voice clarity during transmissions. Unlike traditional noise reduction methods, DNC actively analyzes and suppresses unwanted sounds, resulting in cleaner and more intelligible communication.
This is particularly useful in noisy environments like vehicles or construction sites. DNC doesn’t simply block all sound; it intelligently filters out consistent, unwanted noise while preserving the natural tone of your voice. Google Play’s service fees support Android and Play investments, reflecting their value.
PA (Public Address) System Setup
Utilizing the PA Feature: The Cobra 29 Ltd Classic offers a Public Address (PA) system capability, allowing you to broadcast your voice through an external speaker. First, connect a compatible PA speaker to the designated PA output jack on the rear panel. Ensure the speaker is appropriately rated for the radio’s output power.
Switch the radio to PA mode using the CB/PA switch. Adjust the volume control to achieve the desired sound level. Remember Google Play charges can sometimes be higher than expected, especially with Apple purchases;
CB/PA Switch Functionality
Understanding the Switch: The CB/PA switch on your Cobra 29 Ltd Classic determines the radio’s operational mode. In the ‘CB’ position, the radio functions as a standard Citizens Band radio, transmitting and receiving on designated CB channels. Switching to ‘PA’ activates the Public Address system, utilizing the radio’s amplifier to broadcast your voice through an external PA speaker.
Be mindful of potential unexpected charges, like those sometimes seen with YouTube Premium via Apple Pay, and Google Play’s service fees.

Maintenance and Care
Keep it clean! Regular cleaning and proper antenna care maximize performance. Be aware of potential Google Play charges and storage alerts for optimal use.
Cleaning and Storage
Maintaining your Cobra 29 Ltd Classic is simple. Use a soft, damp cloth to wipe down the unit, avoiding harsh chemicals or abrasives. Ensure the radio is powered off and disconnected before cleaning. For storage, choose a dry, dust-free environment, protecting it from extreme temperatures.
Be mindful of potential Google Play charges, often in USD, and regularly check your storage, as alerts may appear if nearing capacity. Proper storage extends the lifespan of your radio, ensuring reliable communication for years to come. Avoid prolonged exposure to direct sunlight.
Antenna Care and Optimization
Your antenna is crucial for optimal performance. Regularly inspect the antenna for damage, ensuring a secure connection. Keep it free from obstructions like trees or buildings. Consider antenna placement for maximum range; higher is generally better.
Be aware of potential Google Play charges, often in USD, and monitor your account. Proper antenna care significantly improves signal strength and clarity. Avoid bending or kinking the antenna cable. Periodically check for loose connections to maintain reliable communication.
Fuse Replacement Procedures
Before replacing the fuse, disconnect the Cobra 29 Ltd Classic from power. Locate the fuse holder, typically on the rear panel. Use a screwdriver to gently remove the fuse holder cover. Identify the blown fuse – it will have a broken filament.
Replace it with a fuse of the exact same amperage rating. Google Play may charge service fees, often in USD, so monitor statements. Reinstall the fuse holder cover securely. Improper fuse replacement can cause damage or pose a safety hazard.

Understanding FCC Regulations
Adhere to legal guidelines and proper etiquette when operating your Cobra 29 Ltd Classic. Google Play charges fees, and respecting regulations ensures responsible use.
Licensing Requirements (if applicable)
Generally, a license is not required to operate a Citizens Band (CB) radio like the Cobra 29 Ltd Classic within the United States. However, it’s crucial to understand that regulations can change, and operating outside of established guidelines can lead to penalties.
Google Play’s payment systems, while sometimes presenting unexpected charges or requests for recurring payments (like YouTube Premium subscriptions), are separate from CB radio operation. Always verify charges and understand subscription terms.
Staying informed about current FCC rules is your responsibility as a CB radio user, ensuring legal and ethical communication practices. Check the FCC website for the latest updates.
Proper CB Radio Etiquette
Respectful communication is paramount on the CB radio. Avoid excessive profanity, disruptive broadcasts, and intentionally interfering with other users’ transmissions. Identify yourself and your location when initiating a conversation, and listen before transmitting to avoid talking over others.
Like managing Google Play subscriptions and unexpected charges, maintaining courteous radio habits is essential. Be mindful of channel usage; Channel 9 is generally reserved for emergencies.
Remember, clear and concise communication promotes safety and enjoyment for all CB radio operators. Adhering to these guidelines fosters a positive community experience.
Legal Operating Guidelines
Adherence to FCC regulations is crucial for legal CB radio operation. While a license isn’t typically required for standard CB use, broadcasting false information or using the radio for illegal activities is strictly prohibited. Be aware of frequency allocations and avoid transmitting outside designated channels.
Similar to understanding Google Play’s service fees and payment policies, knowing the rules ensures responsible usage.
Respecting these guidelines prevents interference and potential penalties. Operating within legal boundaries maintains a safe and lawful communication environment for all users.