Wood framing construction, guided by codes, offers a balance of tradition and modern safety, evolving from historical fires to today’s advanced techniques, ensuring durability and compliance.
1.1 Historical Background of Wood Framing
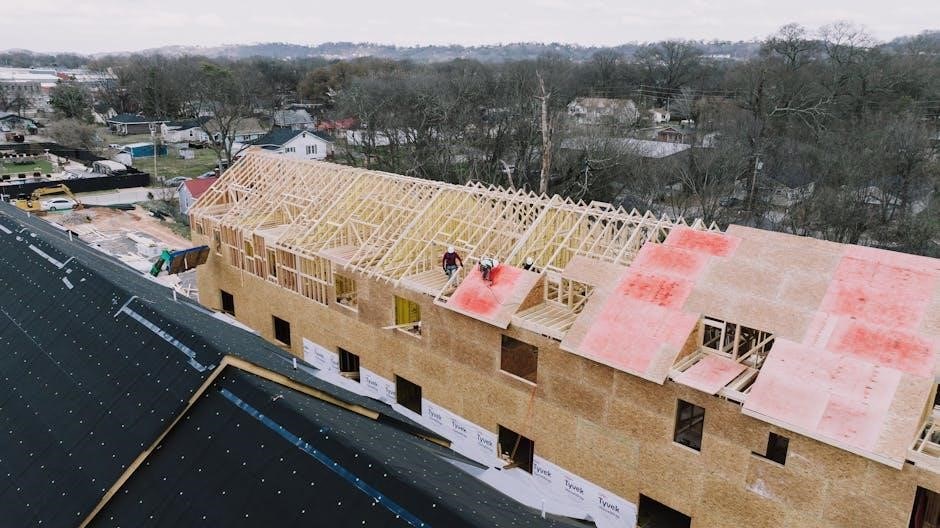
Wood framing has been a cornerstone of construction for centuries, with early examples dating back to ancient civilizations. Its simplicity and availability made it a preferred method for building homes and structures. The Middle Ages saw widespread use in Europe, particularly in timber-framed houses. However, historical fires, such as the Great Chicago Fire of 1871, led to stricter building codes, limiting wood use in urban areas. Despite this, wood framing persisted due to its cost-effectiveness and adaptability. Modern advancements and updated codes have revitalized its popularity, blending tradition with safety and efficiency in contemporary construction practices.
1.2 Evolution of Building Codes for Wood Construction
The evolution of building codes for wood construction has been shaped by historical fires, such as the Great Chicago Fire of 1871, which prompted stricter safety regulations. Over time, codes have balanced fire safety concerns with the benefits of wood framing. Modern codes, like the International Building Code (IBC), incorporate advancements in materials and techniques, enabling taller wood-frame buildings. The American Wood Council’s 2015 Wood-Frame Construction Manual (WFCM) became a national standard, reflecting ongoing efforts to harmonize safety and construction practices. Today, codes continue to adapt, supporting innovative wood construction while ensuring public safety and structural integrity.
Benefits and Advantages of Wood Framing
Wood framing offers sustainability, cost-efficiency, and design flexibility, aligning with modern building codes while providing durable, lightweight structures that meet environmental and aesthetic demands effectively.
2.1 Sustainability and Environmental Benefits
Wood framing construction is highly sustainable, as wood is a renewable resource with a lower carbon footprint compared to steel or concrete. Trees absorb CO2 during growth, making wood a carbon-neutral material. Modern forestry practices ensure responsible harvesting, maintaining forest health. Wood construction also supports energy efficiency, reducing the need for fossil fuels in heating and cooling. Additionally, wood can be recycled or reused, minimizing waste. Certifications like FSC ensure sustainable sourcing. These factors make wood framing a preferred choice for environmentally conscious building projects, aligning with global efforts to reduce greenhouse gas emissions and promote eco-friendly construction practices.
2.2 Cost-Effectiveness and Efficiency
Wood framing construction is renowned for its cost-effectiveness, offering economical solutions without compromising quality. Compared to other materials, wood is lightweight, reducing transportation and labor costs. Prefabrication and modular techniques further enhance efficiency, minimizing waste and speeding up construction timelines. Engineered wood products, such as laminated veneer lumber, provide strength and durability while optimizing material use. Adherence to building codes ensures that these cost benefits are balanced with safety and structural integrity, making wood framing a practical choice for both residential and commercial projects. Its efficiency and affordability contribute to its enduring popularity in modern construction practices.
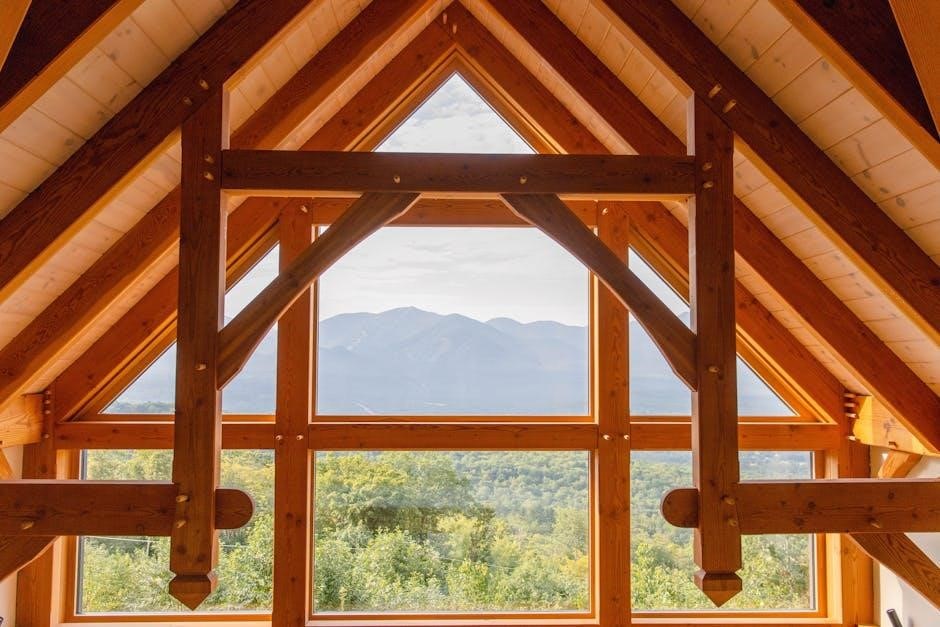
2.3 Aesthetic Appeal and Design Flexibility
Wood framing offers exceptional aesthetic appeal, blending natural beauty with modern design trends. Its versatility allows for open floor plans, intricate details, and customizable finishes, making it a favorite for architects and homeowners alike.
Design flexibility is enhanced by wood’s ability to complement various architectural styles, from traditional to contemporary. Advances in construction techniques enable the creation of visually striking structures while adhering to safety codes, ensuring both functionality and visual appeal.
Safety Concerns and Fire Risks
Historical fires, like the Great Chicago Fire, highlighted wood’s vulnerability, prompting stricter codes to mitigate risks while balancing modern construction techniques and material advancements for safety.
3.1 Historical Fire Incidents and Code Development
The Great Chicago Fire of 1871 marked a turning point in wood construction safety, leading to stricter building codes. This disaster, along with others, prompted regulations to limit wood use in urban areas. Early codes focused on fire-resistive materials, but advancements in wood technology and fire-resistant treatments paved the way for modern wood framing. Historical fires drove the development of standards, ensuring safer practices while maintaining wood’s viability as a construction material. These incidents laid the foundation for today’s comprehensive building codes, balancing safety and construction efficiency.
3.2 Modern Fire-Resistant Construction Techniques
Modern fire-resistant construction techniques in wood framing emphasize advanced materials and engineering. Treated wood, fire-retardant coatings, and engineered wood products enhance safety. Compartmentalization and fire-stopping systems prevent fire spread. The use of sprinkler systems and fire-resistant gypsum boards further improves safety. These methods align with updated building codes, ensuring structures meet rigorous fire standards while maintaining wood’s benefits. Ontario’s updated codes now allow taller wood buildings with enhanced safety measures, showcasing innovation in fire-resistant design. These techniques balance aesthetics, sustainability, and safety, addressing historical fire risks while complying with modern regulations.
3.4 Balancing Fire Safety with Wood Construction
Wood construction, when adhering to codes, balances fire safety through fire-resistive materials and designs. Historical fires, like the Great Chicago Fire, led to stricter codes, while modern techniques enhance safety without compromising wood’s benefits. Fire-resistive construction materials and systems provide critical time for fire suppression. Ontario’s updated building codes now allow taller wood-frame buildings with enhanced safety measures. The American Wood Council’s standards ensure fire safety is integrated into design. By combining traditional wood framing with advanced fire-resistant methods, construction achieves a balance between safety, sustainability, and efficiency, addressing concerns while maintaining wood’s aesthetic and structural advantages.
Key Building Codes and Standards
IBC, NFPA, and AWC standards ensure wood framing meets safety, durability, and environmental requirements, guiding construction practices for compliant and sustainable building designs.
4.1 International Building Code (IBC) Provisions
The International Building Code (IBC) provides comprehensive guidelines for wood framing construction, ensuring safety and structural integrity. It outlines requirements for material standards, fire-resistance ratings, and load-bearing capacities. The IBC specifies allowable heights and areas for wood-frame buildings, balancing traditional techniques with modern advancements. Compliance with these provisions ensures durability and fire safety, adapting to evolving construction practices while maintaining public safety. Regular updates reflect advancements in wood technology and address emerging challenges, making the IBC a cornerstone for compliant and resilient wood framing projects worldwide.
4.2 National Fire Protection Association (NFPA) Guidelines
The National Fire Protection Association (NFPA) provides critical guidelines for fire safety in wood framing construction. These standards emphasize fire-resistive materials and construction methods to mitigate risks. NFPA codes ensure that wood structures meet rigorous safety requirements, balancing the material’s natural combustibility with modern engineering solutions. Guidelines address fire-rated assemblies, ignition prevention, and compartmentalization to control fire spread. Compliance with NFPA standards is essential for ensuring wood-framed buildings are safe, durable, and meet regulatory expectations, particularly in high-risk environments. These guidelines are regularly updated to reflect advancements in fire science and construction practices.
4.3 American Wood Council (AWC) Standards
The American Wood Council (AWC) develops standards for wood construction, ensuring safety and compliance. Its 2015 Wood-Frame Construction Manual (WFCM) is a key resource, approved as a national standard. The WFCM provides engineering and design guidelines for one- and two-family dwellings, addressing structural integrity, material quality, and fire resistance. These standards align with building codes, promoting consistent practices nationwide. By adhering to AWC guidelines, builders ensure durability, safety, and environmental sustainability in wood framing projects. The AWC’s work is instrumental in advancing wood construction while meeting regulatory requirements.
Design and Construction Best Practices
Material selection, precise load calculations, and secure connections ensure compliance with codes, optimizing safety and durability in wood framing projects.
5.1 Material Selection and Quality Control
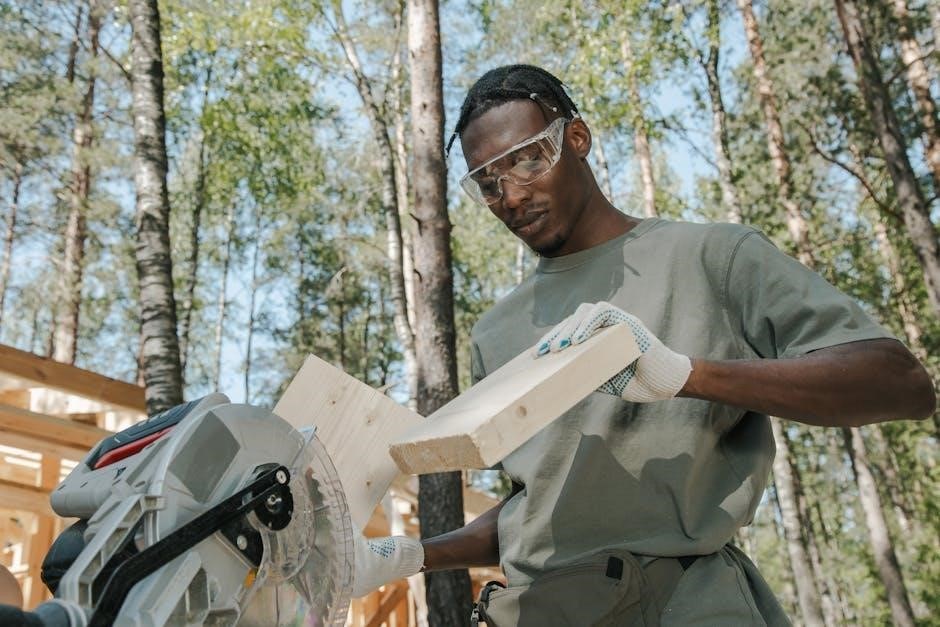
Material selection is critical in wood framing construction, ensuring compliance with codes and standards. Lumber must meet grading requirements, with proper moisture content to prevent warping. Engineered wood products, like I-joists and glulam beams, offer superior strength and stability. Quality control involves verifying material certifications, such as those from the American Wood Council (AWC), and conducting inspections to ensure adherence to specifications. Proper fasteners and connectors are essential for structural integrity. Adhering to these practices minimizes defects and ensures the durability and safety of the structure, aligning with modern building codes and industry best practices.
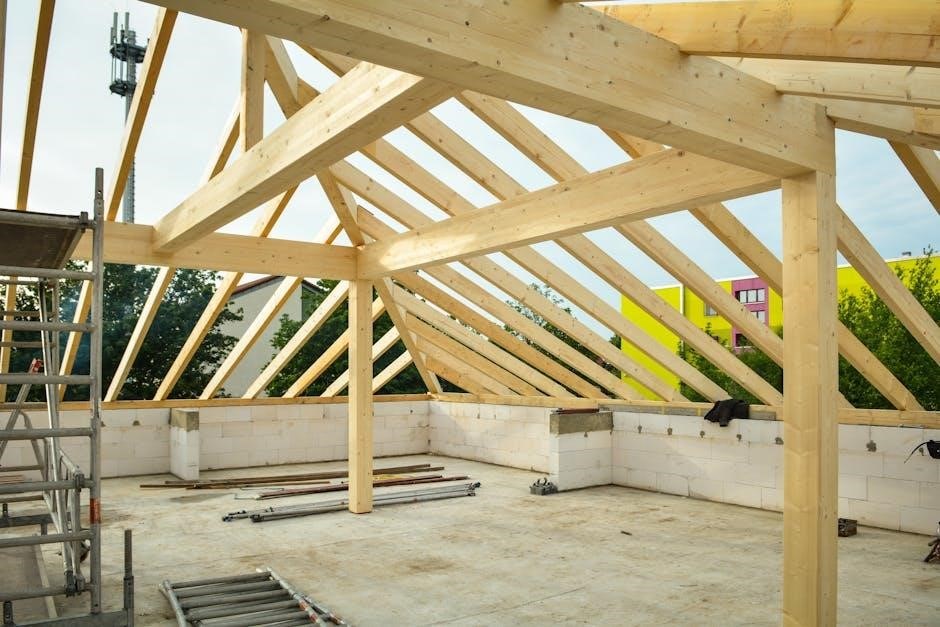
5.2 Engineering and Load Calculations
Engineering and load calculations are critical in wood framing construction to ensure structural integrity. These calculations determine the capacity of wood members to withstand gravity, wind, and seismic loads. Codes like the IBC provide guidelines for designing wood structures, ensuring safety and compliance. Advanced software tools aid in precise calculations, optimizing material use while meeting safety standards. Proper engineering ensures that wood-framed buildings can resist various stresses, making them durable and reliable. Adherence to these calculations is essential for passing inspections and maintaining compliance with building codes, ultimately ensuring the longevity and safety of wood-framed structures.
5.3 Fastening and Connection Details
Proper fastening and connection details are critical for ensuring structural integrity in wood framing. Codes specify requirements for nails, screws, and bolts, emphasizing load-bearing capacities and spacing. Modern techniques, such as engineered connections, enhance durability. Fire-resistant fasteners are essential in high-risk areas. Inspections verify compliance with standards like those from the American Wood Council. Advanced software aids in designing precise connections. Adherence to these details ensures safety and longevity, aligning with updated building codes and fire safety guidelines.

Inspection and Compliance
Inspections ensure wood framing adheres to codes, with inspectors checking for defects like improper fastening. Proper documentation is crucial for certification and compliance.
6.1 Role of Building Inspectors in Wood Framing
Building inspectors play a critical role in ensuring wood framing construction adheres to safety codes and standards. They verify compliance with regulations, inspect materials for quality, and check structural integrity. Inspectors identify potential defects, such as improper fastening or inadequate fire-resistant treatments, which could lead to safety hazards. Their oversight ensures that constructions meet fire safety requirements and load-bearing capacities. By enforcing codes, inspectors help prevent structural failures and fire risks, safeguarding occupants and property. Their expertise is essential for maintaining public safety and upholding the integrity of wood-framed buildings. Regular inspections are vital to ensure compliance and durability.
6.2 Common Defects and How to Avoid Them
Common defects in wood framing include improper fastening, inadequate fire-resistance, and poor material quality. These issues often arise from non-compliance with building codes. To avoid them, ensure strict adherence to code requirements, use high-quality materials, and employ proper construction techniques. Regular inspections by certified professionals can identify and address defects early, preventing costly repairs. Additionally, following fire-resistance standards and maintaining precise engineering specifications are critical for safety and durability. Proper fastening methods, such as using approved nails or screws, also minimize structural weaknesses. By prioritizing compliance and quality control, defects can be significantly reduced, ensuring safe and long-lasting wood-framed structures.
6.3 Documentation and Certification Processes
Proper documentation and certification are critical in wood framing construction to ensure compliance with building codes. This includes detailed plans, inspection reports, and material certifications. The American Wood Council’s manual serves as a key reference for standardized practices. Certification processes validate that construction meets safety and structural requirements, enhancing credibility. While certification is essential, it is part of a broader compliance strategy. Third-party inspections and approvals further ensure adherence to fire safety and structural integrity standards, as seen in updated codes like Ontario’s, allowing taller wood-frame buildings. Accurate documentation and certification are vital for legal and safety compliance.

Modern Advancements in Wood Framing
Advancements include Cross-Laminated Timber (CLT), prefabrication, and technology integration, enhancing efficiency, sustainability, and safety in wood framing, aligning with updated codes and standards for modern construction.
7.1 Cross-Laminated Timber (CLT) and Its Applications
Cross-Laminated Timber (CLT) is a revolutionary wood product offering exceptional strength, stability, and sustainability. Comprising multiple layers of lumber stacked crosswise, CLT is ideal for walls, floors, and roofs in mid-rise and tall wood buildings. Its lightweight yet durable nature reduces construction time and material costs. CLT also meets stringent fire safety standards, as demonstrated in modern building codes. Applications include residential, commercial, and industrial projects, showcasing its versatility; By aligning with updated codes, CLT is transforming wood framing construction, enabling innovative, eco-friendly designs while ensuring compliance and safety.
7.2 Prefabrication and Modular Construction
Prefabrication and modular construction are revolutionizing wood framing by offering efficient, factory-built solutions. These methods reduce waste, improve quality, and accelerate project timelines. Modular components, such as pre-assembled wall panels and floor systems, are manufactured off-site and assembled on-site, ensuring precision and compliance with building codes. This approach minimizes environmental impact and labor costs while maintaining structural integrity. Advances in technology and design software further enhance the customization and scalability of prefabricated wood systems, making them a viable option for modern construction projects. As codes evolve, prefabrication aligns seamlessly with safety and sustainability standards, driving innovation in the industry.
7.3 Integration of Technology and Software Tools
The integration of technology and software tools has revolutionized wood framing construction, enhancing accuracy and efficiency. Building Information Modeling (BIM) allows for detailed digital models, ensuring compliance with codes. Structural analysis software simulates load-bearing capacities, optimizing material use. Automated design tools streamline the creation of framing plans, reducing errors. Additionally, project management platforms improve collaboration, enabling real-time updates and issue tracking. These advancements not only align with modern building codes but also promote sustainable practices, making wood framing more efficient and reliable than ever before.
Case Studies and Real-World Applications
High-profile projects like the Wood Partners Fuse 47 highlight wood framing’s potential, while past fires provide lessons, shaping safer, innovative construction practices and code adherence.
8.1 Successful Wood-Frame Construction Projects
Notable wood-frame projects, like the Fuse 47 in College Park, highlight compliance with safety codes and modern techniques. Ontario’s updated building codes now permit taller wood structures, showcasing innovation. These projects demonstrate how wood framing can meet stringent safety standards while offering aesthetic and environmental benefits. Advanced materials, such as cross-laminated timber (CLT), are increasingly used to enhance durability and sustainability. Such successes prove wood construction’s viability in modern architecture, blending tradition with cutting-edge engineering to create safe, efficient, and visually appealing buildings that align with current codes and environmental goals.
8.2 Lessons Learned from High-Profile Fires
High-profile fires, such as the Great Chicago Fire of 1871 and recent incidents like the Wood Partners Fuse 47 project, have underscored the importance of fire safety in wood framing. These events led to stricter building codes, emphasizing fire-resistive construction and material quality. Modern techniques, including fire-retardant treatments and compartmentalization, have emerged to mitigate risks. Balancing wood’s benefits with safety requires adherence to updated codes and rigorous inspections, ensuring durability and occupant protection while maintaining wood’s aesthetic and structural advantages. These lessons shape safer, code-compliant wood construction practices for the future.
8.3 Emerging Trends in Wood Construction
Emerging trends in wood construction are transforming the industry, with updated building codes now permitting taller wood-frame buildings. Innovations such as cross-laminated timber and modular construction are improving sustainability and construction efficiency. These advancements are leading to increased adoption of wood in modern projects, offering both cost-effectiveness and environmental benefits. Additionally, enhanced fire safety measures and compliance with updated standards are further boosting confidence in wood construction, paving the way for innovative and sustainable architectural designs in the future.
Wood framing’s future lies in code-driven innovation, blending sustainability with advanced materials, ensuring safe and efficient construction practices to meet global demands and environmental goals.
9.1 The Role of Codes in Shaping the Future
Building codes play a pivotal role in shaping the future of wood framing construction by ensuring safety, sustainability, and innovation. Historical events, like the Great Chicago Fire, have driven the development of stringent codes, influencing modern construction practices. The American Wood Council’s standards and updates to the Ontario Building Code highlight the evolving nature of these regulations. As codes adapt, they enable the use of advanced materials and techniques, such as taller wood structures, while prioritizing fire safety and environmental considerations. These guidelines not only protect lives but also foster a future where wood construction remains a viable, efficient, and sustainable option.
9.2 Industry Predictions and Innovations
The wood framing industry is expected to embrace taller structures and sustainable practices, driven by advancements like cross-laminated timber (CLT) and prefabrication. Codes are evolving to support these innovations, enabling wood’s use in high-rise buildings while maintaining safety. Ontario’s updated building codes exemplify this trend, allowing wood-frame constructions to reach new heights. As fire-resistant techniques improve, wood is becoming a viable option for larger, safer projects. These advancements are reshaping construction, blending tradition with modern technology to meet growing demand for eco-friendly and efficient buildings. The future of wood framing lies in innovation, sustainability, and adherence to progressive building codes.
9.3 Final Thoughts on Wood Framing Construction
Wood framing construction, guided by codes, strikes a balance between tradition and innovation, ensuring safety and sustainability. Historical lessons from fires like the Great Chicago Fire of 1871 have shaped modern codes, emphasizing fire-resistant techniques and material quality. Advances in cross-laminated timber (CLT) and prefabrication highlight the industry’s evolution, offering efficient and durable solutions. As codes continue to adapt, wood framing remains a viable option for sustainable and cost-effective building. The future of wood construction lies in adhering to these codes while embracing technological advancements to address safety concerns and environmental impact.